Saturday was National Can-It-Forward Day. While I am a canning enthusiast, this isn’t something that I sign up for or, realistically, to which I pay much heed. For the last two years, however, it seems like I end up canning on Can-It-Forward Day without premeditation.

Showing posts with label recipes. Show all posts
Showing posts with label recipes. Show all posts
Monday, July 16, 2012
Friday, January 27, 2012
Sourdough Surplus
When I signed on for Tea & Cookies Cooking Challenge of sourdough bread with homemade starter, I had no idea how much starter I would end up with. The reason I have so much starter is that unlike the instructions direct, I cannot bring myself to throw away portions of it. So it just keeps multiplying.
 |
| quantity of starter this morning |
 |
| quantity of starter this afternoon (the three half-pints are sitting in the dish in case of overflow) |
Friends and neighbors beware.
Once I figured out that I was going to have more sourdough starter than any individual should ever need, the search for recipes using sourdough starter began. Thus far, I’ve identified four recipes from the King Arthur Flour website to try: sourdough chocolate cake, sourdough carrot cake, sourdough pizza crust and sourdough ciabatta. (As my previous attempt at ciabatta didn’t work out as well as I would have liked, I thought it only fitting to include that one.) In addition to these four, there will also be the upcoming sourdough bread recipe from the Tea & Cookies challenge.
Methinks I’m going to be more of a baker than a homemaker this coming week. Thank goodness I have a patient and understanding husband!
Sunday, January 22, 2012
A Bag of Flour
Have you ever purchased an ingredient with the best intentions of using it right away, only to lose it in the back of a cupboard, the refrigerator or the far recesses of the pantry? This happens to me quite often, I ashamed to admit.
Last week I discovered this bag of flour I purchased at Di Gregorio's Market in St. Louis.
 Although I wasn't worried about the flour "going bad", its best used by date was long gone. So now I'm on a quest to use this entire 5 kg (11 lb) bag of flour.
As quickly as I can.
Last weekend I made homemade pizza using a no-knead crust recipe from King Arthur Flour and a sauce recipe from Tyler Florence. (I didn't have any majoram on hand, so I substituted an equal amount of dried thyme. I also added a pinch of ground chile.) Overall I was pretty happy with that one, but the crust was a little more "bready" than I would have liked. No photos of this one; they all looked fuzzy since the hot from the oven pizza steamed my camera lense.
A mere six days later, I was trying another pizza recipe. I wasn't worried about Tug being tired of pizza since I think he could eat pizza on a daily basis. This time I used a different crust recipe to make a thin crust. Had I followed the directions, I think I'd like this crust better. Instead of making two pizzas, I chose to make one larger pizza and apparently didn't spread the dough thinly enough. I'll definitely try it again and either roll the crust thinner or make two pizzas.
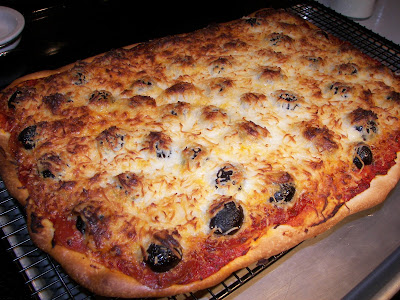 Before the next pizza attempt, or perhaps in between attempts, I'm going to take a stab at some different breads.
This afternoon I started the biga (a pre-ferment) which has to sit at least 18 hours before I can use it to make focaccia. Then I'm going to try my hand at ciabatta again. My previous attempts at ciabatta haven't exactly met my expectations.
And I'm thinking of making some more panettone, even though it's not Christmas Eve I think it will still taste as good.
Last week I discovered this bag of flour I purchased at Di Gregorio's Market in St. Louis.

As quickly as I can.
Last weekend I made homemade pizza using a no-knead crust recipe from King Arthur Flour and a sauce recipe from Tyler Florence. (I didn't have any majoram on hand, so I substituted an equal amount of dried thyme. I also added a pinch of ground chile.) Overall I was pretty happy with that one, but the crust was a little more "bready" than I would have liked. No photos of this one; they all looked fuzzy since the hot from the oven pizza steamed my camera lense.
A mere six days later, I was trying another pizza recipe. I wasn't worried about Tug being tired of pizza since I think he could eat pizza on a daily basis. This time I used a different crust recipe to make a thin crust. Had I followed the directions, I think I'd like this crust better. Instead of making two pizzas, I chose to make one larger pizza and apparently didn't spread the dough thinly enough. I'll definitely try it again and either roll the crust thinner or make two pizzas.

This afternoon I started the biga (a pre-ferment) which has to sit at least 18 hours before I can use it to make focaccia. Then I'm going to try my hand at ciabatta again. My previous attempts at ciabatta haven't exactly met my expectations.
And I'm thinking of making some more panettone, even though it's not Christmas Eve I think it will still taste as good.
Thursday, January 5, 2012
Baking Memories: Grannie's Cinnamon Rolls
Growing up in a very small town (a village, actually, of about 200) there were events and traditions you could count on year after year: there would always be a community fish fry around Labor Day, a weenie roast at Halloween, and one of the villagers would dress up and play Santa for the kids at Christmas. My dad did it one year - he didn't fool me at all. The weenie roast and bags of candy from Santa were provided by the village, but the Fish Fry was an annual fundraiser held for the Fire Department and, later on, the Ambulance Service. There was never any shortage of good food, friends and neighbors, and certain pairs of brothers always getting into fist fights.
Although my grandmother usually only made cinnamon rolls at Christmas time (she always took a tray over to the neighbors on Christmas morning), at some point she started making them for the bake sale table at the fish fry. The ladies working at the table would carefully plate the rolls individually on little foam plates and wrap them in plastic before setting them out on display. The first year Grannie only made one tray of rolls for the bake sale. Not very many people had the opportunity to try them that year. That year, our village marshal bought one of the cinnamon rolls and ate it on the spot. And then he bought the rest of them. All of them. After that, Grannie made two trays of cinnamon rolls: one tray to individually wrap and sell to people attending the fish fry, and one tray to wrap in its entirety and sell to the marshal.
Over the years, I've had many disappointments trying to re-create Grannie's cinnamon rolls. I can't tell you how many different recipes I've tried. "So," you ask, "why didn't you just use her recipe?" Because I never saw Grannie use a recipe. While I'm sure she owned measuring cups, they didn't get used much. She poured ingredients into a bowl without seeming to even think about what she was doing and they turned out perfectly every time. She just knew the recipe. I didn't. And I didn't think a written recipe existed. But I was wrong.
Grannie's cinnamon rolls came up while talking to my mom one day. I was lamenting about my failures and the lack of a written recipe. I nearly fell out of my chair when she said she had it. Could it be? When she sent it to me and I looked at it, I had some doubts. Her report on her experience with the recipe was that it seemed like she needed a lot more flour than what the recipe called for and the baking time may have been too long. Things to consider.
 Before beginning yet another attempt, I compared Grannie's recipe to some other egg/yeast bread recipes and came to the conclusion that two cups of milk was just too much. If I had to venture to guess, I would say there are three possibilities: 1) Grannie never measured, so when asked to put a recipe in writing the amounts were her (perhaps inaccurate) estimation; 2) whoever typed the recipe may have made an error and the actual amount of milk is supposed to be 1/2 cup; or 3) perhaps Grannie new exactly what she was doing and just didn't want anyone else to be able to make her cinnamon roles.

 |
| Grannie Helen |
Over the years, I've had many disappointments trying to re-create Grannie's cinnamon rolls. I can't tell you how many different recipes I've tried. "So," you ask, "why didn't you just use her recipe?" Because I never saw Grannie use a recipe. While I'm sure she owned measuring cups, they didn't get used much. She poured ingredients into a bowl without seeming to even think about what she was doing and they turned out perfectly every time. She just knew the recipe. I didn't. And I didn't think a written recipe existed. But I was wrong.
Grannie's cinnamon rolls came up while talking to my mom one day. I was lamenting about my failures and the lack of a written recipe. I nearly fell out of my chair when she said she had it. Could it be? When she sent it to me and I looked at it, I had some doubts. Her report on her experience with the recipe was that it seemed like she needed a lot more flour than what the recipe called for and the baking time may have been too long. Things to consider.
 Before beginning yet another attempt, I compared Grannie's recipe to some other egg/yeast bread recipes and came to the conclusion that two cups of milk was just too much. If I had to venture to guess, I would say there are three possibilities: 1) Grannie never measured, so when asked to put a recipe in writing the amounts were her (perhaps inaccurate) estimation; 2) whoever typed the recipe may have made an error and the actual amount of milk is supposed to be 1/2 cup; or 3) perhaps Grannie new exactly what she was doing and just didn't want anyone else to be able to make her cinnamon roles.
 At first I considered reducing the milk to one-half cup, but instead went with one cup thinking I could add more flour if necessary. It was necessary. I used five cups of flour plus extra that was kneaded in. It was also necessary to keep in mind that I was using my KitchenAid mixer. Grannie didn't have a KitchenAid. She had a strong right arm.
 Feeling a bit nostalgic, I decided to forgo the French rolling pin I ordinarily use in favor of Grannie's rolling pin. It seemed fitting. I chose to roll the dough on a silicon mat to make clean up easier, but it also turned out to making rolling up the dough easier as well.


 The end result: they're not bad, but still not the same. I think part of the problem is still with the quantity of milk. Adding more flour to make the dough come together throws off the ratio of the other ingredients and, I think, alters the flavor and texture. The next time I make these I'm going to reduce the amount of milk to one-half cup and add the flour gradually just in case that's not enough milk.
I forgot to take pictures of the dough while it was coming together and there are no pictures while I was kneading it because I didn't want my camera covered in dough and flour. Sometimes having a photographer would be very helpful.
 Feeling a bit nostalgic, I decided to forgo the French rolling pin I ordinarily use in favor of Grannie's rolling pin. It seemed fitting. I chose to roll the dough on a silicon mat to make clean up easier, but it also turned out to making rolling up the dough easier as well.


I just lifted one edge of the mat and started rolling like a jelly roll. As for cutting the individual rolls, I thought one-half inch seemed a little on the thin side so mine were closer to an inch thick. I ended up with 17 full size rolls, plus the two ends.

Even though I cut the rolls thicker than directed in the original recipe, Mom said baking them 30 minutes seemed like too long. I set the timer at 20 minutes, checked them and baked an additional 3 minutes. Two minutes probably would have been better. I let them cool slightly and made the icing. Grannie would have made this icing with artificial maple flavoring. There is no such thing in my house, so I used maple syrup.
 The end result: they're not bad, but still not the same. I think part of the problem is still with the quantity of milk. Adding more flour to make the dough come together throws off the ratio of the other ingredients and, I think, alters the flavor and texture. The next time I make these I'm going to reduce the amount of milk to one-half cup and add the flour gradually just in case that's not enough milk.
 The other part of the problem is that there's one ingredient missing that I'll never be able to add: the love Grannie put into making them.

Tuesday, December 6, 2011
White Chocolate Raspberry Cupcakes: Version One
While in the final push on Friday to finish up the previously mentioned cakes and cupcakes for my third bride, I received a call from the wedding assistant of Bride No. 2. She liked the cupcakes I had done for Bride No. 2's wedding and wanted some for her birthday on December 15th. When I first spoke with her, we agreed on two dozen pumpkin spice cupcakes. The next time we talked, she asked if I could do white chocolate raspberry cupcakes. I stammered for a moment because I've never before made white chocolate cake.
Okay, so let's get this out of the way before we go any further: I know white "chocolate" technically isn't true chocolate, but for the sake of conversation it's easier. However, when I do say "white chocolate" I mean the confection that's made with cocoa butter, sugar, milk and vanilla, not the sickly sweet "white baking chips" made with ingredients difficult to pronounce.
That being established, my concern about white chocolate in cake was that it's a much more subtle flavor than it's darker counterparts so it could be a challenge to get the flavor to come through. Then I had to think about the raspberry - would adding raspberry to the cupcake overpower the white chocolate completely? You never know until you try. So I did. I left most of the cupcakes plain, but experimented with adding raspberry puree to a few of them. (I hate the fact that "raspberry puree" has Prince's "Raspberry Beret" running through my head.)
The cake recipe I began with is adapted from Cupcakes, a Better Homes and Gardens Special Interest Publication that I found while waiting in the check out line at the grocery store some time ago. Starting with their yellow cupcake recipe, I reduced the sugar and vanilla and added six ounces of melted white chocolate. I think if you know there's white chocolate in the cupcakes you'll taste it, but otherwise it may be overlooked. I'm pretty sure if I replace some of the butter in the recipe with culinary cocoa butter, I'll get the flavor I'm looking for. If I can find culinary cocoa butter locally, I'll give it a try. Not holding my breath on that, Plan B is to add chopped white chocolate chunks to the batter in addition to the six ounces of melted white chocolate.
 The cupcakes with the raspberry puree weren't as texturally appealing as those without it. There's a bit of a "raw dough" texture around the puree. Not so appetizing. You can see the difference on the inside between the cupcake I tried to swirl in the puree and the one that just had puree on top. As for the flavor, it didn't really add much but enough to mask the white chocolate. That's exactly what I thought may happen.
Since I had plenty of raspberry puree left over, I decided to make raspberry buttercream and leave the cupcakes as the white chocolate component. At least the buttercream didn't disappointment me. Both the color and flavor stayed vibrant. As the cupcakes are now, I still think the raspberry will overpower the white chocolate. (I haven't tried this combination yet; my palate needs a break from sweet right now.) But, I also made a litte bit of white chocolate ganache. I'm thinking of piping a little star of ganache on top to get the white chocolate flavor mixed in with the raspberry flavor.
Okay, so let's get this out of the way before we go any further: I know white "chocolate" technically isn't true chocolate, but for the sake of conversation it's easier. However, when I do say "white chocolate" I mean the confection that's made with cocoa butter, sugar, milk and vanilla, not the sickly sweet "white baking chips" made with ingredients difficult to pronounce.
That being established, my concern about white chocolate in cake was that it's a much more subtle flavor than it's darker counterparts so it could be a challenge to get the flavor to come through. Then I had to think about the raspberry - would adding raspberry to the cupcake overpower the white chocolate completely? You never know until you try. So I did. I left most of the cupcakes plain, but experimented with adding raspberry puree to a few of them. (I hate the fact that "raspberry puree" has Prince's "Raspberry Beret" running through my head.)
 |
| Some I swirled in the puree, others just drizzled it on top. The ones with the drizzle on top look like someone bled on them. Kinda gross. |
The cake recipe I began with is adapted from Cupcakes, a Better Homes and Gardens Special Interest Publication that I found while waiting in the check out line at the grocery store some time ago. Starting with their yellow cupcake recipe, I reduced the sugar and vanilla and added six ounces of melted white chocolate. I think if you know there's white chocolate in the cupcakes you'll taste it, but otherwise it may be overlooked. I'm pretty sure if I replace some of the butter in the recipe with culinary cocoa butter, I'll get the flavor I'm looking for. If I can find culinary cocoa butter locally, I'll give it a try. Not holding my breath on that, Plan B is to add chopped white chocolate chunks to the batter in addition to the six ounces of melted white chocolate.

Since I had plenty of raspberry puree left over, I decided to make raspberry buttercream and leave the cupcakes as the white chocolate component.
 At least the buttercream didn't disappointment me. Both the color and flavor stayed vibrant. As the cupcakes are now, I still think the raspberry will overpower the white chocolate. (I haven't tried this combination yet; my palate needs a break from sweet right now.) But, I also made a litte bit of white chocolate ganache. I'm thinking of piping a little star of ganache on top to get the white chocolate flavor mixed in with the raspberry flavor.
 In the meantime, I'll distribute these to a few taste testers tomorrow and see what kind of feedback I get. Hopefully I'm on the right track.
Monday, September 26, 2011
Versatile Pâte à Choux
Yesterday it rained. All day. And while the cool, dampness began stirring within me the desire to turn on the oven, the desire to curl up on the sofa with a good cookbook and a marginally interesting movie was stronger. Today, the sun is shining. It’s a gorgeous day. And I turned on the oven. It was time to make some éclairs. I’ve been thinking about these since making the vanilla-orange curd last week. Today was the day to put thoughts into action.

The pastry part of the éclair is made from pâte à choux, which to me seems to fall somewhere in between a batter and a dough. I don't know why I don't use it more often, because it's truly such a simple dough to produce such elegant results. Pâte à choux is used not only for éclairs, but also for cream puffs, profiteroles and gougeres. As a side note, I had to look up the difference between cream puffs and profiteroles. Profiteroles are essentially miniature cream puffs which may have a sweet or savory filling. Gougeres are piped in the same manner as cream puffs, but have cheese (traditionally Gruyere) and black pepper added to the dough, and are not typically filled.
 The recipe I used for pâte à choux today is the one we used in school. Because of that, the ingredients are by weight versus volume. The volume measurements I have provided in parentheses may not be 100% accurate, but should be close enough as to not affect the final product. Also, some recipes add sugar. The recipe I previously used from Amy Finley calls for sugar. Either is fine. You’ll probably have better browning with the sugar. I think I may one day try pâte à choux in terms of a ratio: one large egg to each ounce of milk, water, butter and flour. That would certainly make it easy to remember, providing that it works.
An important note on the quantity of eggs: you may not need the entire 12 ounces of eggs. Ambient humidity and the amount of evaporation while cooking can affect the dough and how much egg it will require. Make sure to read the recipe through before beginning. The recipe can easily be cut in half, keeping in mind that half of 1/4 cup is usually 2 tablespoons.
Pâte à Choux
6 oz (3/4 cup) milk
6 oz (3/4 cup) water
6 oz (3/4 cup or 1-1/2 sticks) unsalted butter, cubed
Pinch salt
6-1/4 oz (1-1/4 cups) all-purpose flour, sifted
12 oz (6 large) eggs, beaten
Combine the milk, water, butter and salt in a saucepan and bring to a boil over medium-high heat. Remove the pan from the heat, add the sifted flour all at once and stir vigorously with a wooden spoon until it forms a dough. Reduce the heat to medium and return the pan to the heat. Cook and stir the dough for 30 to 60 seconds or until a film begins to form on the bottom of the pan.
 Transfer the dough to the bowl of a stand mixer fitted with the paddle attachment. Mix on medium speed for about one minute to cool the dough. Gradually begin adding the beaten egg in a thin stream, adding no more than a tablespoonful at a time. The mixture will look “curdled” throughout much of the process. Whenever that happens, stop adding egg and mix until it smoothes out.
  |
| The "droop" test for medium peaks. |
At the point when the dough begins to look more like a thick batter, stop mixing. Scrape the sides and paddle and test the consistency of the dough by quickly dipping a spoon in the dough. Hold it upright. If the dough stands straight up, you’re at stiff peaks and more egg needs to be added. The goal is medium peaks, which is where the dough will stand up but the very tip will droop slightly.
For éclairs:
Preheat oven to 425°F.
 |
| The narrow space is for spacing in between the rows of piped eclairs. |
Transfer the pâte à choux to a pastry bag fitted with a large round tip. I use Ateco 806. You can also use a large star tip, but I prefer the more traditional, smooth tops. On a parchment lined baking sheet, pipe the éclairs about three inches long and two inches apart. I like to rule my parchment on the back to make sure I'm keeping the size consistent. To keep from having a pointy end, release the pressure on the piping bag while quickly pushing the tip upward toward the piped éclair. (This probably makes more sense when you look at the picture.) After the éclairs are piped, run the tip of a sharp knife down the outside edge of each éclair. Be careful not to cut too deeply. This will help the éclairs keep their shape.
 |
| Finishing the eclairs. |
 Bake the éclairs for 10 – 12 minutes, or until golden brown. Cool slightly and then pierce each end with a skewer to make holes for the filling. Allow to cool completely before filling. The éclairs can be filled with pastry cream, curd or stabilized whipped cream using a piping bag fitted with a small star tip. When filled, dip the tops in melted chocolate (or drizzle the chocolate over them). The full recipe of pâte à choux makes approximately five dozen mini éclairs.
For gougeres:
When the pâte à choux reaches the proper consistency, add one cup of finely grated cheese (traditionally Gruyere, but I prefer Parmigiano-Reggiano) and coarsely ground fresh black pepper to taste. Transfer the pâte à choux to a pastry bag fitted with a large round tip, such as Ateco 806, and pipe quarter-sized mounds of dough about an inch tall. Use the back of a spoon dipped in water to flatten out the peaks.
Preheat oven to 400°F.
 |
| Placing the pastry bag in a cup with the tip folded will help keep the batter/dough from oozing out of the tip. |
Bake the gougeres 14 – 16 minutes or until golden brown. Remove from the oven and let cool slightly. When cool enough to handle, use a skewer to poke a small hole in the bottom (to release steam) and transfer to a wire rack. I think these are best served warm, so if necessary reheat them in the oven before serving. The full recipe of pâte à choux makes approximately five dozen gougeres.
 |
| The finished eclairs filled with vanilla-orange curd and drizzled with white chocolate. |
 |
| The finished gougeres. I thought it would be nice to do something savory for the hubs. |
Tuesday, September 6, 2011
One Cake Down, One to Go
Earlier in the year, I had agreed to do a small wedding cake and cupcakes for a couple referred to me by a classmate from culinary school. The wedding was September 3. Of course at the time we had made these arrangements, I had no idea that my personal life would suffer the losses that it did. I think that made me more vulnerable than usual. While it's usual for me to get stressed when I'm doing cake for someone else, it was on the extreme side this time. When I'm doing something that is so personal - for me and the other person - it causes self-doubt to creep in. It didn't creep in this time so much as hit me like a linebacker. This small cake gave me as much difficulty as it did doubt.

 These are the cappuccino cupcakes with mocha buttercream and the finished candy clay acorns. It's quite possible these are my favorite cupcakes.

 Peanut butter cupcakes with chocolate ganache underneath a candy clay maple leaf.

 |
| The beginning of the candy clay acorns. |
Despite the unseasonably warm temperatures, it was a fall-themed wedding. Who knew in April it would be 100 degrees in September? The bride wanted about five dozen cupcakes with fall-themed decorations and a small white cake to cut. We agreed on peanut butter cupcakes with chocolate ganache, cappuccino cupcakes with mocha buttercream and pumpkin spice cupcakes with cream cheese buttercream. She also wanted the cake to be peanut butter with ganache filling. She liked the look of fondant, but not the taste; so my plan was to cover the cake with white candy clay. I've used chocolate candy clay to cover a cake before and it worked beautifully. White candy clay did not. I finally made a judgment call and went with straight buttercream. This presented problems of it's own as you must be very careful not to make marks in the buttercream once you have it smoothed. And you have to figure out how to fix it when you have a decoration fall off and leave a big divot.
 |
| These leaves ended up getting tossed. The gold color I was using beaded up on the candy clay. |
I can't say the icing was perfectly smooth. Sometimes it's necessary to recognize that trying to fix it can only make it worse. At least I had sense enough to realize that.
Going with the buttercream presented another problem as well. My original plan was to make small, leaf-shaped tuiles in fall colors to have sort of a "leaf pile" on top of the cake. (The bride didn't have a topper. My instructions were "make it pretty.") Given that the tuiles would likely absorb moisture from the buttercream, I needed a plan B there as well. Honestly, I struggled with this one. Finally I decided to use some of the uncooperative candy clay to make ribbon roses. Ribbon roses are not my favorite decoration. I prefer more realistic flowers, but there simply wasn't time. And since ribbon roses are not my favorite decoration, I'd not made them before. I'm sure they could have been better. My lack of experience and the fact that just the heat from my hands made the uncooperative candy clay even more so was problematic, but this is mere hours before delivery so it was time to just make it work. I had shortened my deadline because I wasn't aware of what the set up was going to be and needed to make sure I had enough time to set up and be gone before the wedding party arrived. I made my deadline, didn't get lost, and even got it all delivered and set up intact. And most of the anxiety was dismissed after I received a wonderful follow-up note from the bride.


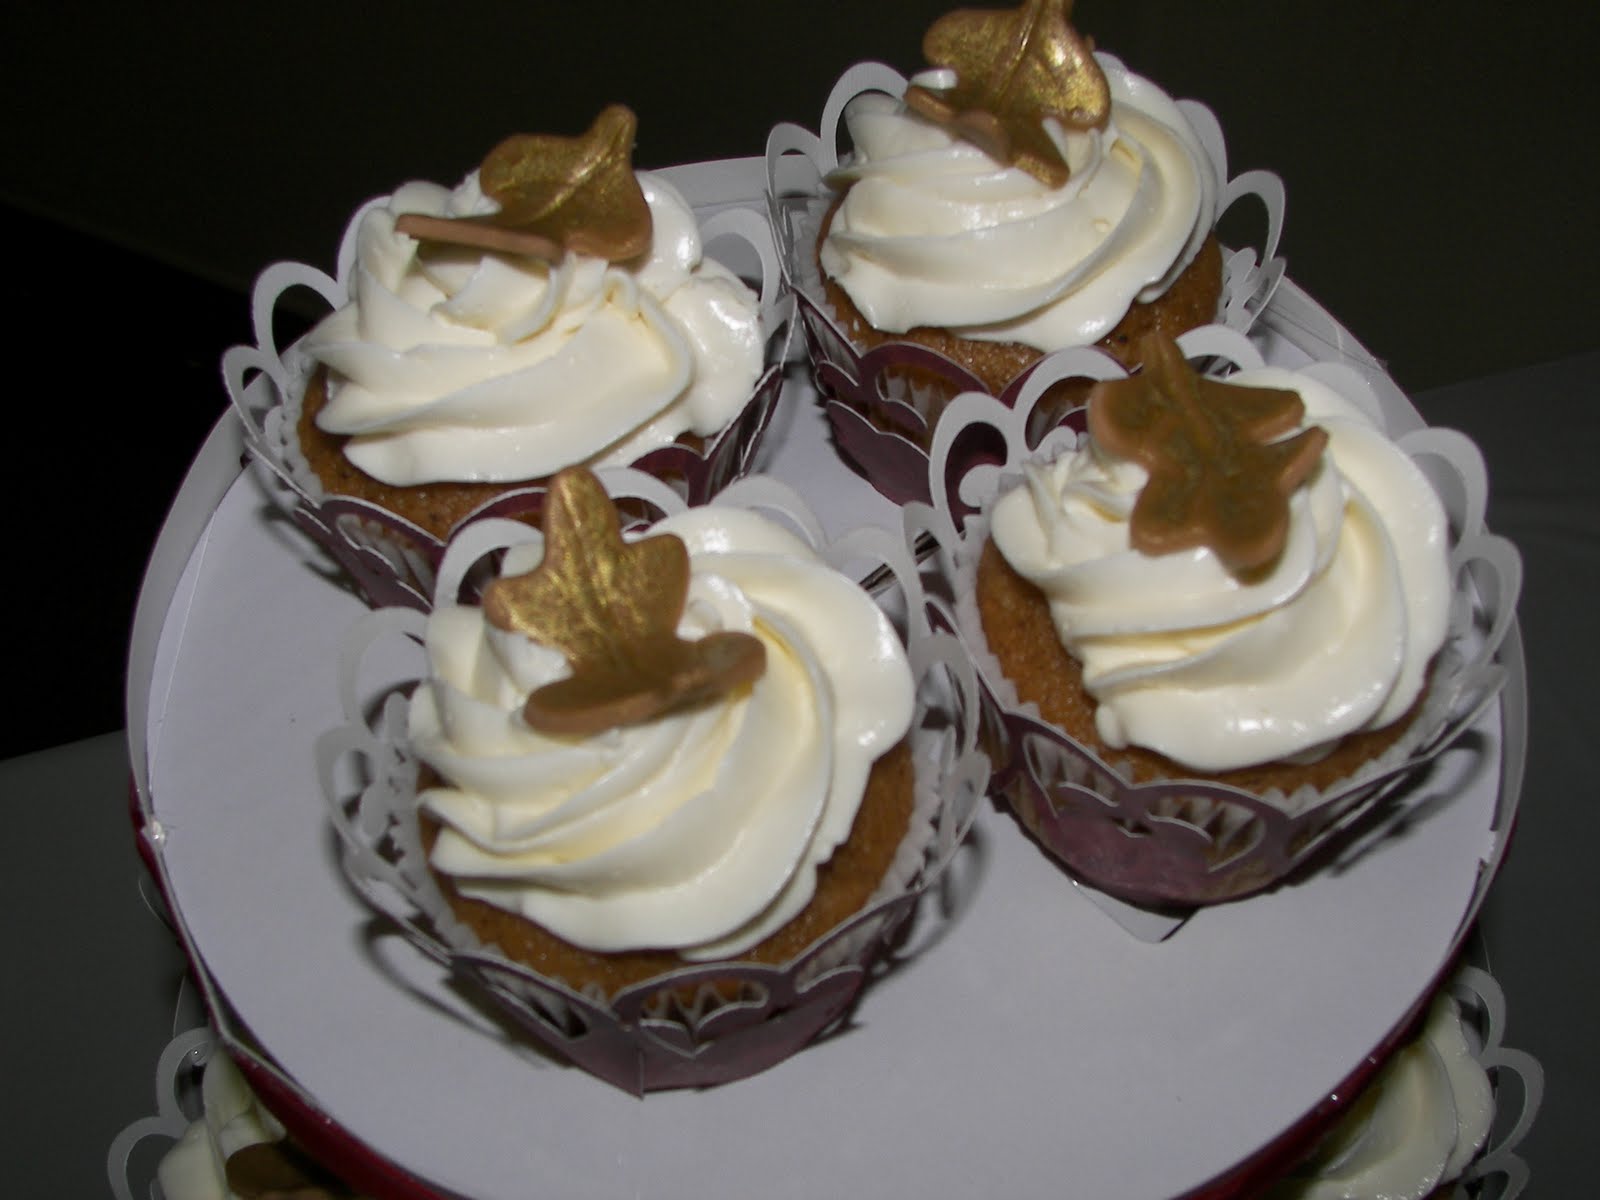
Pumpkin spice cupcakes with cream cheese buttercream (not the sickly sweet stuff) and edible gold painted fondant leaves.
 Peanut butter cupcakes with chocolate ganache underneath a candy clay maple leaf.
The wedding cake with vanilla buttercream, candy clay roses and leaves, fondant ribbon and initial plaque. By the time I was finished with this cake, I was a nervous wreck and swearing I wouldn't do any more cakes. Except the one I promised my friend, Alicia, I would do for her sister's bridal shower. For 80 people. On September 18. Occasionally, I am a glutton for punishment.
Cappuccino Cupcakes
¼ cup Kahlua or other coffee liqueur
⅓ cup instant coffee granules
¾ cup whole milk
3 cups all-purpose flour
1 tsp baking powder
½ tsp baking soda
1½ cups unsalted butter, softened
2 cups granulated sugar
1 tsp pure vanilla extract
½ tsp salt
5 each large eggs
Preheat oven to 350°F. Prepare muffin tins with paper liners.
Microwave the liqueur and ¼ cup milk until warm in a glass measuring cup. Add instant coffee and stir until coffee dissolves, reheating as necessary. Watch carefully – it will boil quickly!! Add enough of the remaining milk to equal 1 cup of liquid and set aside.
In a medium bowl, sift together flour, baking powder and baking soda.
In a large electric mixer bowl, beat butter until soft. Add granulated sugar, vanilla and salt and beat until light. Lightly beat eggs in a large measuring cup. Add eggs approximately two tablespoonfuls at a time beating well after each addition. Stop to scrape the bowl and paddle halfway through.
Scrape the sides of bowl and paddle. Add flour mixture into butter mixture alternately with coffee liquid, beginning and ending with flour. Using an ice cream scoop, fill muffin tins approximately ¾ full.
Bake 18 – 20 minutes or until toothpick inserted in center comes out clean. Remove from oven and cool in pan on a rack 5 minutes. Remove cupcakes from pan and cool completely on a wire rack.
If you don't want to use alcohol in this recipe, just use very strong coffee or espresso.
Makes approximately 36 cupcakes.
Mocha Buttercream
1-1/2 cups granulated sugar
1 Tbs instant espresso
3/4 cup whole milk
1-1/2 Tbs all-purpose flour
1-1/2 tsp natural cocoa
1/4 tsp salt
1 Tbs vanilla extract
6 Tbs heavy whipping cream
2-1/2 cups unsalted butter, cubed, room temperature
Heat the milk, sugar and instant espresso over medium low heat in a heavy bottomed pan until the sugar dissolves. Remove the pan from heat and gradually sift in the flour, cocoa and salt while whisking until smooth. Cover with plastic wrap directly on the surface and refrigerate for at least 30 minutes to cool. After the mixture is cooled, whisk in the vanilla extract.
Pour the cooled milk/sugar mixture into the bowl of a stand mixer fitted with a paddle attachment. On low speed, add the cream and butter cubes. Continue mixing on low for about 30 seconds to incorporate the butter. Gradually increase the speed to medium high (about 8 on a KitchenAid). The buttercream will start to look curdled. It’s okay – don’t panic! Just keep going; it’s nearly impossible to overbeat this icing. Beat for 8 – 10 minutes or until the buttercream is smooth and creamy. It will happen.
This is definitely a fair-weather icing; it does not hold up particularly well in warmer temperatures.
Tuesday, March 1, 2011
What's for Dinner?
Despite two years of culinary classes, I am still quite pathetic when it comes to menu planning. I've noticed that far too often in the past few months, dinner around here ends up being a "fend for yourself" affair. That's not setting well with me. The daughter of my friend, Terry, posted an observation on her blog, llama-et-burro, awhile back that really struck me: "Feed myself like I like myself. If I had a friend over for lunch and fed them a piece of cheese, some chocolate, a banana, and a glass of milk, I wouldn't be a very good friend." A very astute observation, indeed. Thank you, Alanna.
In the past, the hubs has done the majority of the cooking. But now that he's in the midst of working toward tenure and promotion, he really doesn't have time. He has a lot of other things on his plate, so to speak, and with a stay-at-home wife (again, who went to school for culinary arts!), he shouldn't have to. (This should not in any way, shape or form be mistaken for a subservient 50's mindset. Those who know me, certainly know better!)
Given the fact that I've accumulated literally thousands of recipes over the years, menu planning shouldn't be that difficult. I am making it more difficult than it needs to be. I think it has to do with the fear of rejection. Cooking is very personal to me; it's a way of expressing to people that I care about them. To make something that isn't well received can be very disheartening. While I get very excited about trying new recipes, I also get a bit anxious as well.
But it's time. So I'm now in the process of selecting recipes I want to try and making up my grocery list. A few of the ingredients I'll need are a bit on the pricey side, but not many and I don't feel badly about spending money on meals prepared at home. So far I have four recipes selected: another tagine (using beef instead of lamb) with couscous; General Tso's chicken with lo mein noodles; Spanish pork chops with chorizo and green beans; and pasta shells stuffed with spinach, pancetta and cheese. Not much, but it's a start.
I'd be lying if I said I was making one of these tonight. I've got the grocery list started, but I won't set foot in any store at the first of the month without the hubs along as my bouncer. Left over pizza it will be!
Subscribe to:
Posts (Atom)