Showing posts with label apples. Show all posts

Saturday, October 22, 2011

A Tale of Two Cakes

This week I made two different cakes - one good and one evil.  Can you tell the difference?


Let me give you a hint:  much can be hidden under icing.

Let's begin with the evil - and I don't mean evil in the sense that "this cake is so good it's evil".  The cake was inspired by a cake I saw in the August 2011 issue of Martha Stewart Living.  (Yes, I am an unapologetic Martha fan.  Think of me what you will.)  The look of the cake absolutely intrigued me.  It was layers of pastel colored cake covered in creamy white buttercream.  Upon reading the article and recipe, I was less enthusiastic upon learning it was a frozen rainbow chiffon cake made not really of cake, but essentially meringue with fruit puree.  Despite the fact that, at the time, I didn't have sufficient freezer space for such a project anyway, making a frozen cake in August in Southern Illinois is asking for trouble.  But I did come up with another idea.  The result of that is the iced cake on the left, or what I refer to as the antithesis of cake. 

I have very strong convictions about what cake should and shouldn't be.  According to "Dawn's Rules of Cake", this cake is, essentially, everything I think cake should not be.

Dawn's Rules of Cake
  1. Cakes should always be made from scratch.  This one is not.  I used (gasp!) boxed cake mixes.
  2. With the exception of dietary restrictions, cakes should always have butter.  This one has canola oil.
  3. Eggs should be cracked from their shells, not poured from cartons.  Egg whites from a carton were used in this cake.
  4. Cakes should not contain artificial colors and/or flavorings.  These cake layers are colored and flavored with unsweetened Kool-Aid.  It doesn't get any more artificial than that.
  5. Buttercream should not contain confectioner's sugar.  Four pounds of the stuff in and on this bad boy.
 
So given all of that, why did I even made this cake?  I'm still working on that, but all I can come up with is just for kicks.  To me, it doesn't even taste good.  Yes, I did taste a bite of each layer.  It reminds of of SweeTarts.  Kids would probably like it, but I'd never do that to a child.  And it's still in the refrigerator because I have no idea what I am going to do with it.  It's just not something I'll give to people I like.  I'm not even sure I'd give this to people I don't like.  Plus, I had absolutely no intention of eating the slice I removed for the picture so now it's also a broken and bandaged cake as I put the slice back. 

In summary, this was not a well-thought project and I'm feeling like I wasted time, money and ingredients.  Apparently I think keeping it in the refrigerator for now will temporarily assuage my guilt. 

It's my story; I'll tell it how I want.  Now, on to the good.

Earlier this month while visiting family and friends back home, I wandered into the newly opened Goodwill store with my friend, Bonnie.  I bought a small suitcase for my dad so he'll no longer have to borrow one when he comes to visit.  I also found a little copper-colored squirrel mold that matches a couple of molds that were my Grandma's, and a vintage egg slicer.  But my coup de grace was a cast aluminum bundt pan for a little under $9.  I've been wanting a bundt pan for awhile, but wasn't excited about shelling out the $$ for one.  My $9 pan has seen better days and I was concerned some of the scratches and flaws would be a problem.  Not so.

I used the pan on Tuesday to bake my favorite apple cake.  This is my go-to fall cake.  I absolutely love it and I don't know why I only make it once a year, other than it makes it seem more elevated in stature when it's an annual thing.  Sort of like only having pumpkin pie at Thanksgiving.  This time I did omit the chocolate chips from the recipe and used two cups of chopped walnuts.  The apples I had on hand were not tart and I didn't want the cake to be cloyingly sweet.  They were barely missed.  I did eat the slice missing from the photo at the top, and even broke the rule of waiting until the cake was cool to cut it.  I guess maybe this week was about breaking rules.

Instead of greasing and flouring the bundt pan, I used Wilton's Cake Release.  While the cake release probably violates the artificial ingredient rule, the stuff just plain works.  The cake came out of the pan beautifully, even from the areas that were severely scratched. 

Since I do like this cake so much, getting rid of it wasn't a problem at all.  Over half of it went to work with the hubs, some went to a friend, and I kept several slices for myself.  I was sad to eat the last slice last night.  Maybe I'll have to go back to the orchard and get some tart apples and make this again with the chocolate chips.  After all, I need to see how the cake will release with the chips in the batter, right?

Friday, September 30, 2011

Farewell to Peaches – Welcome Apples

The peaches I became so fond of over the summer are now gone and the orchards are brimming with apples.  As pleased as I was with my previous attempt at applesauce (the brown sugar cinnamon), I decided I wanted to try something a little different.  I stopped by Flamm Orchard on Wednesday and picked up two bags of apples:  Golden Delicious and Jonathan. 


For this batch of applesauce I chose, for no particular reason, to make the sauce with equal amounts of both varieties of apples. 


The plan was to roast the apples and caramelize the sugar before adding it to the sauce.  My thoughts on roasting the apples were that they would get that nice, roasted flavor (they didn’t) and if I roasted them with the peels on the peels should come off easily after roasting (they didn’t).  In retrospect, I don’t think I roasted them long enough.


It took me nearly an hour to separate the apples from their peels.  The only positive of this endeavor was that roasting the Jonathans with the skin on gave the apples a beautiful, rosy color.  I can’t say in the end the color was worth the effort, but it was a consolation at the time.


As for caramelizing the sugar, I’ve done this only a couple of times before:  once successfully, once not so much.  To help ensure this attempt would be successful, I consulted my Baking and Pastry textbook.  I used the “dry method” of mixing a small amount of lemon juice with the sugar and cooking it just until melted and golden.


I knew that when I added the melted sugar to the applesauce it would seize and harden immediately.  Since the sauce still needed to cook, the liquid and heat would re-melt the hardened caramel into the sauce.  I had hoped the caramelization would impart sort of a “caramel apple” flavor to the sauce but in keeping to the apparent theme of the day – it didn’t. 


While this batch of applesauce didn’t turn out as well as I envisioned, it’s still pretty good and I’m not giving up on the recipe/method just yet.  I still have plenty of apples to try again.  If at first you don’t succeed . . .


Saturday, August 27, 2011

Therapy in Jars

For most of my life I've had a fondness for canning and preserving.  When I was too young to participate, I still loved to be in the kitchen at my grandma's farm watching her or studying what Dad was doing from the dining room at our house.  Canning is sort of a family tradition.  So now when I'm in the kitchen making jam or jelly or trying some other preserved endeavor, it seems to ground me and connect me to my family.  Dare I say - I believe it's therapeutic.  I know it's, at the very least, comforting.

Peaches in ginger syrup.  One of my new favorites.
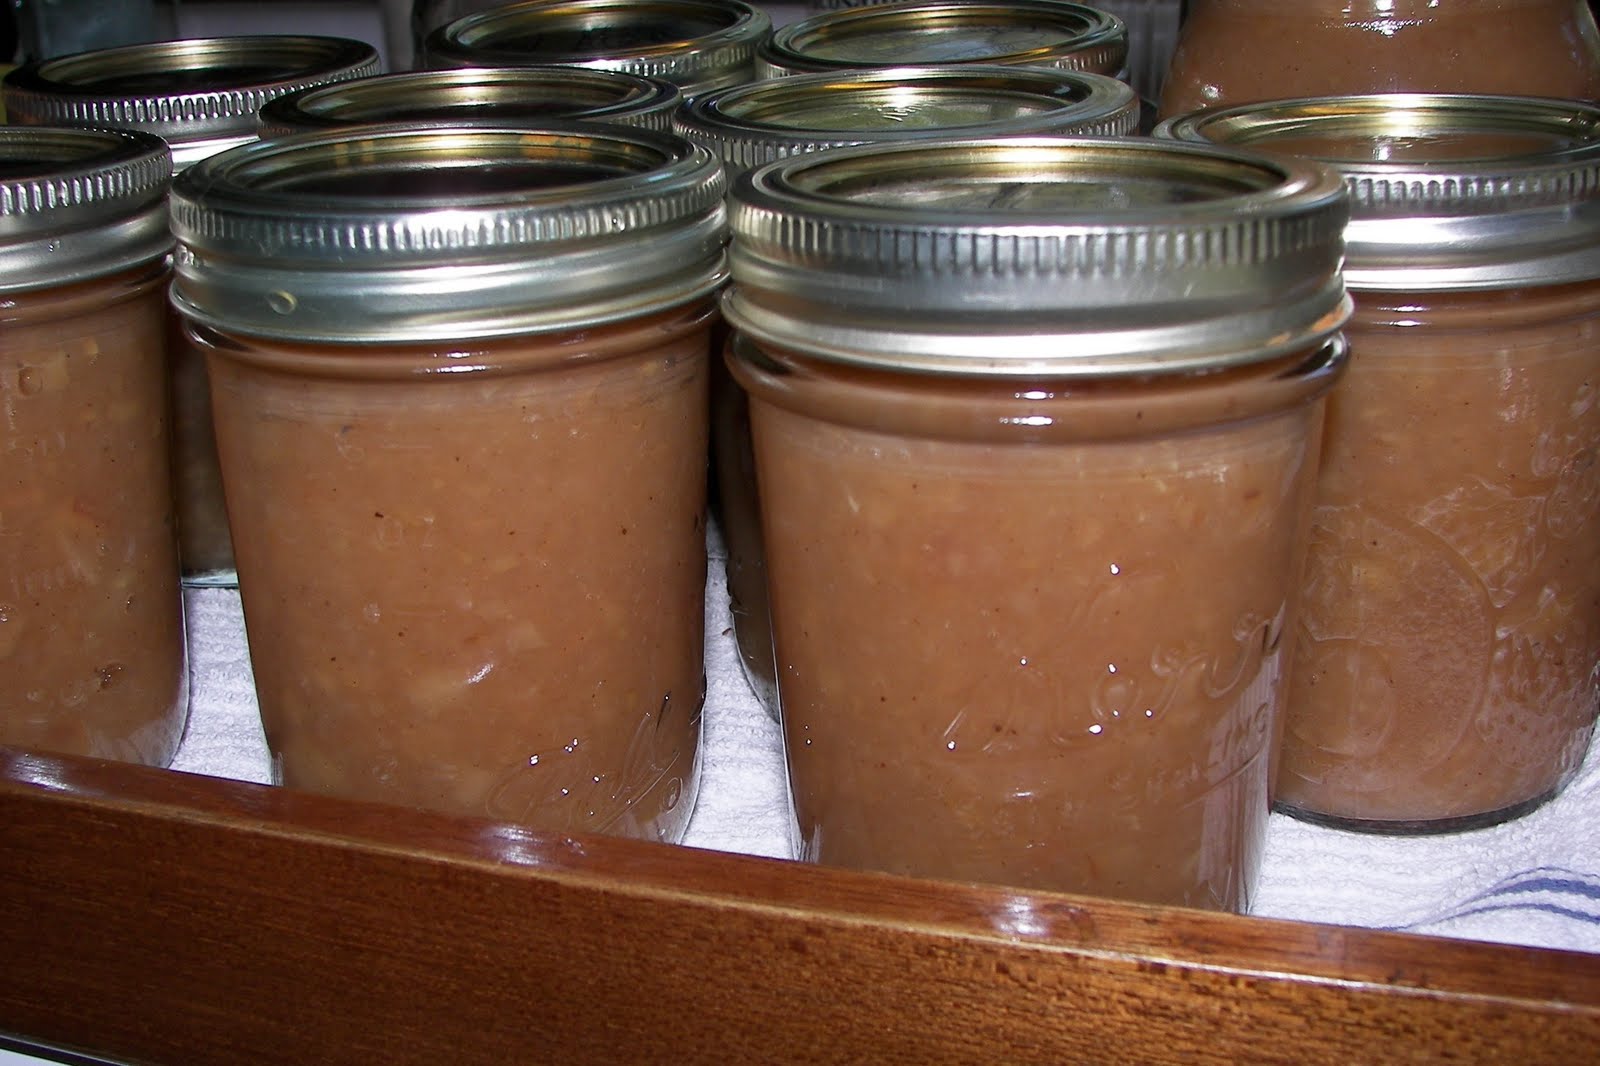
Dad and I went to Flamm Orchards on Thursday and picked up half-peck crates of peaches and apples.  The intent was just to get peaches for a cobbler that evening, but the apples were calling to me as well.  Since I didn't use all of the peaches for the cobbler, today's therapy session included more peaches in ginger syrup (after trying these I had to do some more!) and brown sugar-cinnamon applesauce.  I still used the raw-pack method on my peaches despite the fruit float, but this time cubed them into bite-sized pieces.  The ginger syrup I used was more that was left from a previous candied ginger craze.  I just couldn't bring myself to pour the left-over syrup down the drain.  I'm so glad I didn't!

The applesauce was a recipe put together from Sherri Brooks Vinton's Put 'em Up! and the Ball Blue Book of Preserving.  I took a little I liked from each recipe and put them together.  And doubled the recipe.  While doubling hasn't worked out well for me previously, I wasn't disappointed today.


I started by scrubbing a little over six pounds of Gala apples.  As I wanted to finish this canning project before dinner, I chose not to peel the apples.  I'm still undecided about this.  I like the fact it keeps more fiber in the applesauce, but have concerns about the texture.  After they cool, I'll crack open one of the processed jars for evaluation.  (That's my story and I'm sticking to it.)  Some leave the peels on for the color, but these weren't spectacularly colored apples and didn't impart much in the way of color. 
Apples
I quartered, cored, then halved the pieces before tossing them into the pot with a cup of water, one-quarter cup lemon juice and two small cinnamon sticks.  To keep the ones on top from browning, I occasionally jostled them around a little bit.  Not that I get too excited about browned apples when I'm making applesauce.  If you're adding cinnamon - which I did - it's going to be on the brown side anyway.


Sauce

Both recipes said to run the cooked apples through a food mill.  I don't happen to have a food mill (yet) so I used the food processor, being very careful not to overfill it and send screaming hot applesauce flying about the kitchen.  I could see that scenario quite clearly in my mind. 

Jars ready to be processed
After processing the apples, they were returned to the pan with some brown sugar.  Following the Ball Blue Book, I used one-quarter cup of sugar for every pound of apples.  This came back to a bubble to dissolve the sugar and then I added a teaspoon of cinnamon and a teaspoon of vanilla extract.  This was ladled into hot half-pint jars and processed in a water-bath canner for 10 minutes.  I ended up with enough sauce for 11 half-pint jars.

I'm not finished with my canning projects by any means.  There are still three pounds of frozen peaches waiting for me and while Dad was here we found an amazing deal on apricots and now I have about six pounds of apricots in the freezer as well. But I do have to interrupt my therapy to cause myself some more stress.  I'm committed to doing a small wedding cake and cupcakes for a reception next Saturday.  So while I'd like to be canning, next week will be devoted to all things cake.


(As a post-script to Dignity in the Face of Adversity, my dear aunt succumbed to her cancer early last Saturday morning.  Dad and I were able to be with her the Thursday and Friday prior.  For that opportunity, we will both be forever grateful.)


Brown Sugar-Cinnamon Applesauce
1 cup water
1/4 cup lemon juice
2 small (3”) cinnamon sticks
6 lbs apples (peeling optional)
1-1/2 cups brown sugar
1 tsp ground cinnamon
1 tsp vanilla extract

Have a water-bath canner and 11 – 12 half pint jars and lids prepared.

Add the water, lemon juice and cinnamon sticks to a large (at least 6 qt.), heavy stock pot.  Peel (if desired), core and cube the apples, dropping them into the pot as you go.  Stir occasionally to coat all the apples with the liquid.

Cover the stock pot and bring to a boil over medium-high heat.  Reduce the heat to medium and simmer for 10 – 20 minutes, or until the apples are softened.  Run the cooked apples and cooking liquid through a food mill or process in batches in a food processor.

Return the applesauce to the stock pot over medium heat and add the brown sugar.  Stir to dissolve and bring to a slow boil.   Add the ground cinnamon and vanilla extract and stir well to combine thoroughly.

Ladle the hot applesauce directly into hot, half-pint jars.  Wipe the rims and seal with lids and bands.  Process the jars 10 minutes in the boiling-water canner.  Remove the canner from the heat; remove the lid and allow the jars to sit in the water for five minutes before removing to a rack or towel to cool.  Let the jars cool 24 hours before testing the seal.  Refrigerate any jars that did not seal.  Store sealed jars in a cool, dry place for up to one year.