Thursday, August 11, 2011

Off-Topic: Dignity in the Face of Adversity

Last Sunday, I learned that my Aunt Ruth had been diagnosed with colon cancer.  It was obviously upsetting to me but not devastating as I know that with current treatments and procedures, colon cancer is not as deadly as some other types of cancer or cancer in other areas of the body.  Devastation was not to be denied, however.  Later that day I was informed that it was recently learned that the cancer had spread to her liver and her stomach.  I wanted to scream.  I wanted to hit something.  Instead, I cried.  Sobbed uncontrollably in the arms of my loving husband is actually more accurate.
I took this picture of our gentle giant the day before he left us.

  
This was not the first time in the last few weeks I had cried.  Three weeks ago our wonderful dog, Cochise, was found a have a large, inoperable tumor on his bladder.  Instead of aggressive, useless treatments, we chose to bring him home to be with us - his family.  He passed away two weeks ago.  The news of Ruthie's diagnosis arrived while we are still grieving his loss.

Sunday evening, I found myself to be in the midst of significant self-pity.  It lasted until I realized that I wasn't truly the one suffering.  Until I thought about Ruth and who she is.  She would not be feeling sorry for herself.  Truly, I don't believe she is capable of self-pity.  The more I thought about her, the stronger I felt.  Strong enough that today I bypassed the second-hand reports of relatives and called Ruthie herself.  Her very first question:  a truly sincere "How are you?"


Ruth as a young woman

Ruth knows she is facing terminal illness.  She's not afraid.  She doesn't feel sorry for herself.  Her only regret, although she probably wouldn't call it that, is that she never made it to Hawaii.  The cruel irony is that her grandson is about about to be stationed in Hawaii.  She has been waiting for him to be relocated. 

My dad and I are planning to go visit Ruthie in the very near future.  Before we go, I am going to go to my storage unit and retrieve all of the photos (I know photos should not be in a storage unit) I took while I was in Maui and put together a slide show for her.  I know it's not the same, but at least she can see what I saw. 

Aunt Ruth isn't going to have a funeral.  She doesn't want one.  Her request is to be cremated and her ashes strewn.  I don't know how and I don't know when, but I will make sure that some of her ashes go to Hawaii.  It's the very least I can do for someone who's done so much for me.  If I can learn to be a little more like her, she will have done more for me than she could ever imagine.

Monday, August 8, 2011

Reminiscing Culinary School

One of the classes in my culinary program was Garde Manger, which we were taught loosely translates to “cold kitchen”.  The content of the class focused primarily on salads, soups, sandwiches, sauces/dips and appetizer/hors d’oeuvres.  It was a class ordinarily taken by second year students.  Ordinarily.  I ended up in this class in my first year.  There were 20 students (in the beginning) and only about four of us were first years.  We were grouped into teams of four.  Of the four on our team, three of us were first years.  The class was incredibly fast-paced as we only had 2 hours and 50 minutes, and some of that time had to be devoted to lecture, demonstration and evaluation. 

The particular class day I was remembering on Friday was devoted to sauces and dips.  In the brief time span of our class, we were to make hummus, guacamole, tapenade and salsa.  With four people, this shouldn’t be a problem.  The problem was that only two of our four were there:  me and another first year.  My lone partner for that day had never tried hummus, professed not to like “green food”, and hated olives of any color.  I was not feeling optimistic.  Somehow we managed to eke out all four sauces and an A. 

Why was I remembering that particularly hellacious day on Friday?  Because I made hummus and salsa on Friday. 

In the last month or so, I’ve had a near addiction to hummus.  There have been very few days pass that hummus in some form or another hasn’t occupied space in our overcrowded refrigerator.  I’ve made hummus from garbanzo bean flour (besan), from canned beans and from dry beans I’ve cooked.  I’ve made it with garbanzo beans, butter beans and black beans.  I’ve yet to find hummus that I just flat out do not like.

 
A cool lunch on a hot day for the Hubs and me.

This odyssey really began Tuesday when I started soaking the beans.  I had a pound of dry garbanzos and half of a pound of Roman beans that were long abandoned from some other recipe.  Given the heat wave we’ve been experiencing, I was not looking forward to the 1-1/2 to 2 hour cook time for tender beans.  That’s why I decided re-employ the slow cooker.  The beans had to be cooked in two batches (one Wednesday and one Thursday) given the size of the crock, but it was a small price to pay for not heating up the kitchen any more than necessary.  I covered each batch of beans with fresh water, added a bay leaf, half of a teaspoon of coriander seeds and half of a teaspoon of mixed peppercorns.  Two hours on high, five on low and viola!  Perfectly cooked beans. 

 A pound of dry beans makes about six cups of cooked beans.  There are always more than I need for the recipe, but that works out well since I can never resist scooping out some of the still warm beans, giving them a drizzle of olive oil and a sprinkle of salt and pepper and enjoying them blissfully on their own.  Truly one of the reasons why I go to the trouble of cooking dry beans instead of buying canned.  The downside of using dry beans is that it’s difficult to get a really smooth texture to the hummus.  But I’m okay with that. 

 
The salsa I made tasted nothing like what we made in school, which, to me, was a very good thing.  The recipe we were given to follow is not one I’ll ever use again.  It led me to discover that I am not a fan of oregano in my salsa.  What I made was actually closer to what restaurants here call pico de gallo – tomatoes, chiles, cilantro and garlic.  Not accurately, however.  I learned from the Food Lover’s Companion that pico de gallo (Spanish for rooster’s beak) is actually “a relish made of finely chopped ingredients like jicama, oranges, onions, bell peppers, jalapeno peppers and cucumbers, along with various seasonings.”  Now I know.

Hummus with Cilantro & Jalapeno
Makes about 1-1/2 quarts

2 cups fresh cilantro leaves and stems, washed well and spun dry
4 cups cooked garbanzo beans (reserve some of the cooking liquid)
1 – 2 jalapenos, seeded if desired, coarsely chopped
4 – 6 cloves garlic, peeled and halved
Zest and juice of half of a large lime
1/2 tsp turmeric
2 tsp salt
2 tsp ground cumin
1/2 tsp freshly ground pepper
1/2 cup sesame paste (tahini)
1/4 cup olive oil
1/2 - 3/4 cup reserved cooking liquid, water or stock

Add the cilantro, beans, jalapenos, garlic, lime zest and juice, turmeric, salt, cumin and ground pepper to the bowl of a food processor.  Pulse a few times to combine.  Add the tahini and process to a paste.  With the machine running, drizzle in the olive oil through the feed tube.  Slowly add enough of the reserved cooking liquid to achieve the desired consistency.  Taste and adjust seasoning as necessary.

(And a personal note here:  when tasting, do NOT use the same spoon that was previously used to seed the jalapenos!)


So. Ill. Pico de Gallo
2 cups diced tomatoes
1/2 cup finely diced red onion
3 jalapenos, seeded and minced
4 large garlic cloves, minced
2 cups loosely packed cilantro leaves, chopped
2 Tbs olive oil
1 lime, juiced
1/2 – 1 tsp salt (or to taste)

Combine all ingredients but the salt in a glass or other non-reactive bowl.  Taste and add salt as desired.  Cover and chill.  Taste again before serving and adjust seasoning as necessary.  Refrigerate for up to three days. 

Makes about 3 cups.


Wednesday, August 3, 2011

Just Peachy

That's how I hope August will be.  I need peachy.  I can't say life gave me lemons in July, because I love lemons.  It was more like life gave me durian in July.  

But mid-July, I decided to go to one of our local orchards and get some fresh peaches.  I don't know why I thought I could pick up peaches on a Wednesday afternoon and have time to process them all when I was trying to get ready to leave early that Friday morning to spend the weekend at my dad's.  Before coming to my senses, I managed to get a few trays of sliced peaches dehydrated. 


The melon baller did a great job removing the stringy
 centers around the pit. I hated losing the color though.

Putting my knife skills to the test.  I think they're
about below average right now.


The plan for some of these is to go in some
instant oatmeal cookies using maple
and brown sugar oatmeal.


The rest were to become brandied peach jam.  I realized there was not time to accomplish this and rather than have rotten peaches when I returned, the peaches were pitted, sliced and frozen.  And that's the way they stayed until yesterday.  Yesterday I decided a bit of kitchen therapy was in order. 


I looked in several of my canning books for recipes and finally decided to combine a couple of them for what I wanted.  I would have preferred a pectin-free jam, but I wasn't interested in having the stove on that long.  It's still quite hot in Southern Illinois.  My problem with the pectin, especially low/no sugar varieties, is that the set of your final product is always a guessing game:  it may set perfectly, it may set too firmly, it may not set at all.  In this case, I think the set is a little firmer than what I would like for jam.  But I'm still happy with the taste.  For now, anyway.  Shae at Hitchhiking to Heaven blogged about some of her peach and bourbon jam that, after several months, had become quite thin and "tasted like a distillery."  I'll have to report back to you on mine.  (Speaking of reporting back, those mango tres leches cupcakes - never did work.  The milk mixture for soaking became too thick to be absorbed.  Disappointing failure.)

Pretty peach puree

After the jam, I still had some peaches left.  I considered pate de fruit, but humidity is a problem and I think the puree would be best with fresh fruit versus frozen.  I went ahead and pureed what I had left but instead of pate de fruit it's in the slow cooker with some maple syrup to hopefully become a maple peach butter.  Time will tell on that one as well.

I still have the maple peach oatmeal cookies to make, but I'm already scheming on going back to the orchard for another box of peaches.  I still like the idea of peach pate de fruit and maybe a peach/white wine jelly and some canned peach halves and . . . .

Brandied Peach Jam
This is somewhere between jam and preserves.  I considered adding a handful of currants and calling it a conserve.  It’s a franken-recipe cobbled from peach jam recipes in the Ball Blue Book and those included with Sure-Jell low/no sugar pectin.  Makes 6 – 7 half pint jars.

5 cups pitted, peeled, slightly crushed, fully ripe peaches **
1 cup brandy
2 Tbs lemon juice
1 box (1.75 oz) low/no sugar needed powdered pectin
2-1/2 cups granulated sugar
1/2 cup packed brown sugar

Prepare a water bath canner and seven half-pint jars, lids and bands before beginning.

Combine the peaches, brandy, lemon juice and pectin in a large, heavy bottomed pan over medium to medium-high heat.  Stir to dissolve the pectin and bring to a rolling boil, stirring constantly so it doesn’t stick to the bottom of the pan.  Add the sugars and return to a rolling boil stirring constantly.  Once a rolling boil is achieved, boil and stir for one minute.  (If the jam begins gelling before one minute, remove from heat at that point.)  Remove the pan from the heat and skim off any foam. 

Ladle the jam into hot jars leaving 1/4-inch headspace.  Place lids on the jars and gently screw on the bands.  Process the jars 10 minutes in a covered boiling water canner.  Remove the canner from the heat, remove the lid and let the jars sit for 5 minutes before removing.  Allow to cool completely, remove bands and test the lids to make sure they sealed.  Refrigerate any jars that did not seal.

Store in a cool, dry place for up to 6 months.  (A year is standard, but since this has less sugar it may have a shorter shelf life.)


**I was using peaches that had been frozen and thawed, so I used 4-1/2 cups with their juice.  I also saved the peels from the peaches to freeze and use later in peach jelly to give it a beautiful color.


Tuesday, July 19, 2011

Mango Tres Leches Cupcakes - Maybe

Several years ago I came across Michael Chiarello's recipe for Mango Dos Leches.  I had printed it off thinking I would try it, stuck it in a folder and promptly forgot about it.  When the 2011 Ice Cream Cupcake Contest was announced, I started thinking about it again, determined that eventually I would try this recipe.  Today is eventually.  And of course, I made modifications to the recipe.  Right now, I'm not sure how that's going to work out for me. 

The cake is a typical genoise of which, in and of itself, I'm not particularly fond.  To make half of the original recipe, I started with 3 room temperature eggs, 1/2 cup granulated sugar and 1/8 teaspoon salt (I didn't reduce the salt).  This gets whisked at high speed until tripled in volume.

1 minutes
I started on low speed and worked my way up to high just so I wouldn't sling egg and sugar all over the walls.  (I need to invest in a pour/splatter shield for the 4 quart mixer.)  Once at high speed, I whisked for 3 minutes although I don't think it would hurt if you went a bit longer.  Some of it will depend on your mixer and ambient temperature.
2 minutes

3 minutes
Three minutes seemed to do the trick.  I really thought it was going to take longer, but I think I was recalling the days of making genoise in the 20 quart mixers at school.  Big difference!

At this point it's time for my least favorite part:  folding in the flour.  I sifted in 1 cup of flour plus 1/32 teaspoon of cayenne pepper in three additions, folding gently after each.  The folding is my least favorite part because I'm always concerned about not getting all of the flour mixed in without deflating the eggs. 
As you can see, I found streaks.  This was actually part of a huge pocket of flour that was trying to hide from me.  I think I eventually got it all, but I won't place any bets on that. 

I scooped the batter in the foil lined cupcake pans and baked at 350F for 14 minutes.  Originally, I set the timer for 18 minutes, but I could smell the cupcakes at 12 so I started checking them after that.  Again, baking time will depend on individual ovens.

It's kind of hard to tell from the photo, but all of the cupcakes sank when they came out of the oven.  I didn't mind so much since it would help keep the milk mixture from pouring down the sides. 

While I let these cool for a bit, I heated 1/2 cup milk and 1/2 cup coconut milk in the microwave in two 1 minute intervals.  To that I added 2/3 cup sweetened condensed milk and 1/2 teaspoon vanilla extract (I omitted the almond extract from the original recipe.)  When the milks were well combined, I added 2/3 cup of mango puree and mixed well.

Using my basic math skills, I figured I had about 2 cups (16 fl ounces) of milk/mango mixture and 16 cupcakes so each cupcake should get 1 ounce (2 tablespoons). 

After poking holes in the cupcakes with a bamboo skewer, I began spooning the milk/mango mixture over the top.  Here's where the problem began.  It appears as though the acid in the mango is sufficient to curdle the milk, making the mixture extremely thick.  The cupcakes are not absorbing it.  So far I have one tablespoon of the milk/mango mixture that's been sitting on the cupcakes for about an hour now.  It's not looking promising.  There may need to be a Plan B involved.

Thursday, July 14, 2011

Dinner Inspired by the Garden(s)

Garden 1:
A couple of years ago our friend and former neighbor, Terry, decided to give me his AeroGarden hydroponic garden.  Why he decided to part with it I'm still not sure and ordinarily I would have done the polite, "oh, I couldn't possibly!"  But I had really been wanting one, so I accepted.  So far I've used it to grow herbs and lettuce and cherry tomatoes.  The tomatoes are in it right now and were one of the main attractions in last night's dinner.

Garden 2:
The garden on the deck is having mixed results.  Between the two tomato plants, there's a whopping 7 tomatoes.  I won't be canning my own tomatoes this year.  The sweet peppers and chiles are doing okay and the herbs are growing fabulously.  I've been pulling flowers off the basil all week to keep it growing and from going to seed.  Basil was another star of last night's dinner. 

So what was last night's dinner?  With tomatoes and basil all I can think of is Insalata Caprese - the Italian salad of tomatoes, basil and fresh mozzarella.  I threw in some gobetti for a pasta alla caprese.  The "sauce" for this is essentially a salsa cruda or raw sauce.  Since it's not cooked, only heated by the hot pasta, using the freshest, most flavorful ingredients is especially important.


The basic ingredients.

The end result was absolutely everything I wanted it to be.  Apparently the hubs thought so too.  He's normally tepid on pasta for dinner, but he ate two helpings last night.

Prepped and ready for the pasta


The tomatoes from the hydroponic garden were juicy and full of flavor.  I'm not certain I would be able to tell they were grown indoors if I were to taste them against fresh traditional garden grown tomatoes.  The basil was vibrant and spicy.  It's nearly impossible to get that kind of flavor from the grocery store.  It would have been awesome if I had made my own mozzarella, but that requires a little more planning.

The amounts in my recipe are very open to interpretation and personal preference.


Buon Appetito!
 Pasta alla Caprese
6 – 8 oz dry pasta (whatever shape you like)
Sea salt
1 cup cherry tomatoes
1 ball (about 8 oz) fresh mozzarella
5 - 7 large basil leaves
2 Tbs olive oil
Kosher or sea salt and freshly ground pepper to taste

Cook the pasta according to package directions, adding a tablespoon or so of sea salt to the boiling water.

While the pasta is cooking, halve the cherry tomatoes if necessary and place in a large bowl.  Dice the mozzarella into cubes about the same size as the tomatoes and add to the bowl.  When the pasta is almost finished, cut the basil into a chiffonade and add to the bowl.  (The basil will begin to turn dark once it's cut.)  See the photos below for chiffonade technique.

Drain the pasta and add to the bowl.  Drizzle with the olive oil, season with salt and pepper and toss gently to combine.

Serve with some crusty bread to soak up the juices. 


How to chiffonade basil:

Stack the clean, dry basil leaves on top of one another.

Start from the long edge and roll like a cigar.

Slice across the basil roll to make fine ribbons - chiffonade.
Viola!

Monday, July 11, 2011

Crazy from the Heat

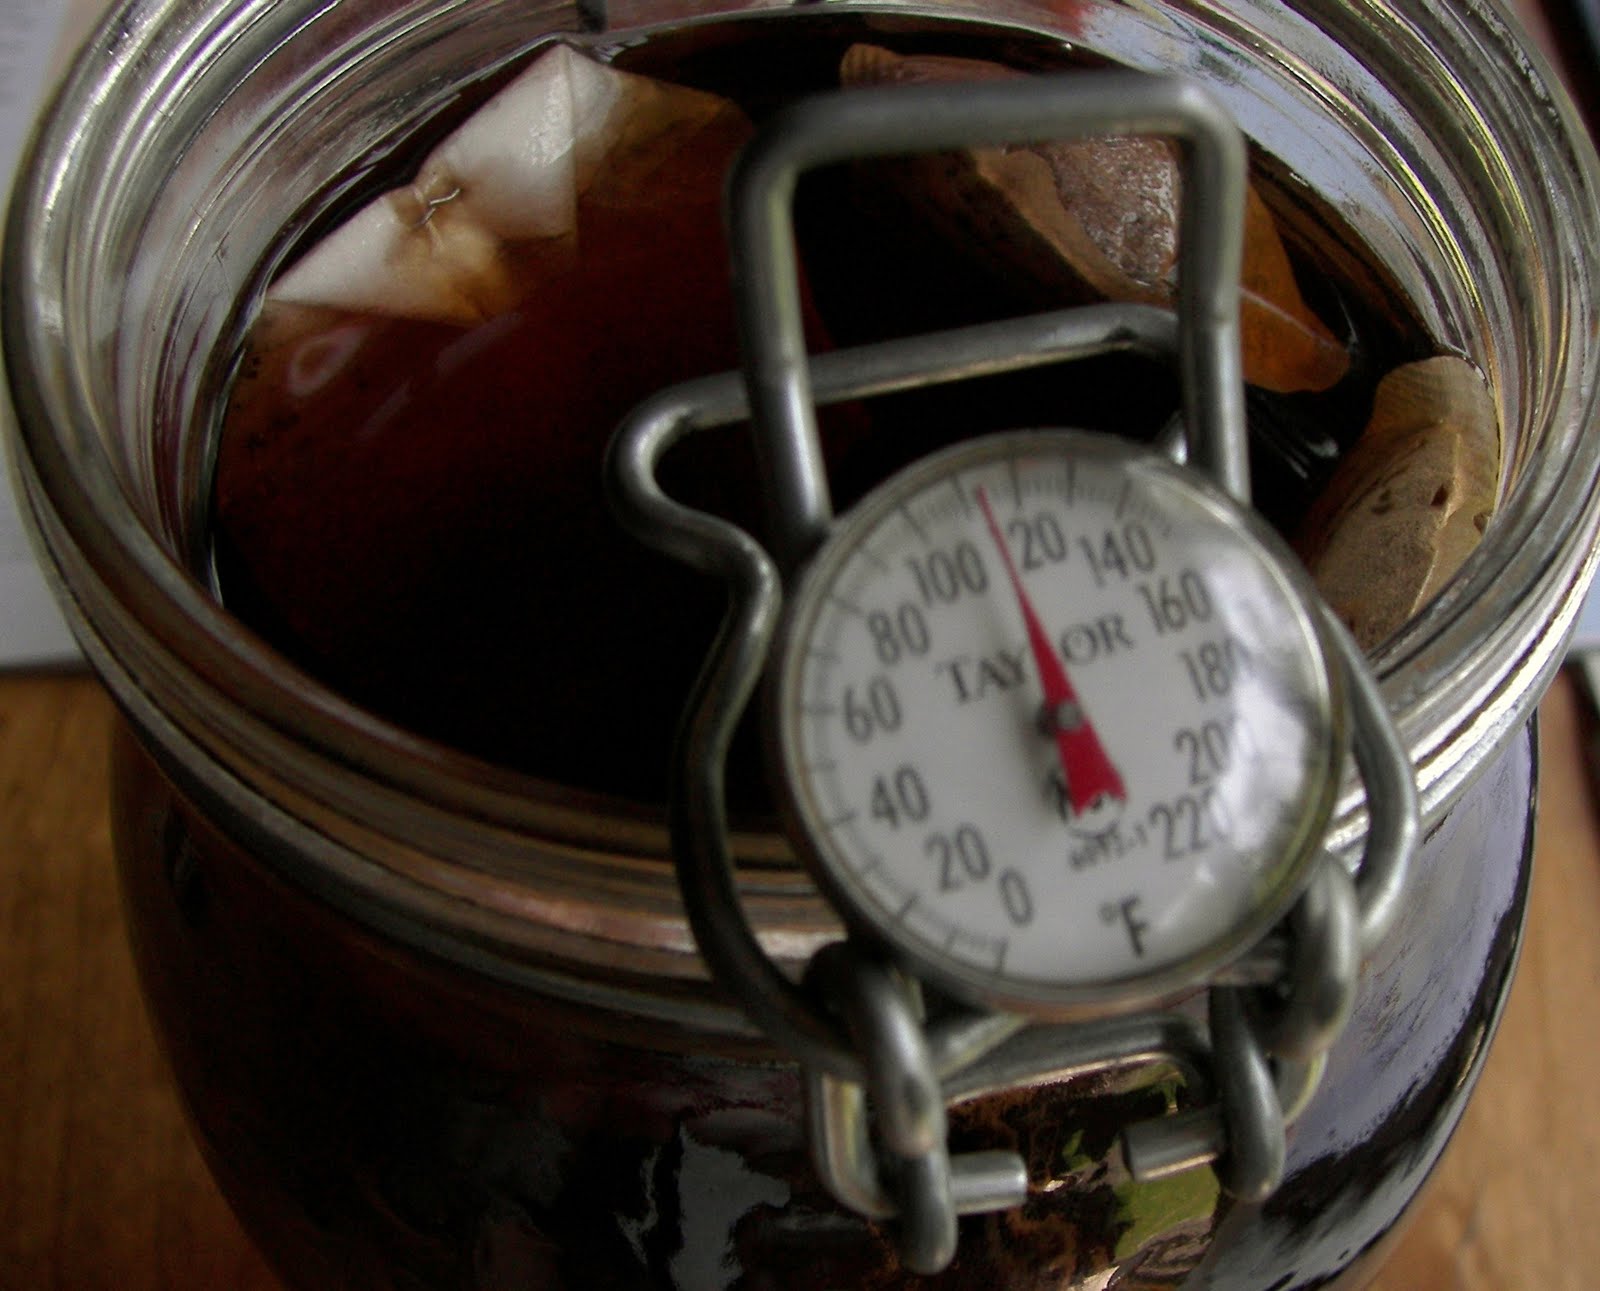
Today is turning out to be one of the hottest days yet.  Right now the temperature with heat index is hovering at 110 degrees.  I'm not a fan of hot, humid weather.  My initial plans for the day included stopping by the garden center and running a few other errands.  Those plans have since changed and I have stepped outside only as absolutely necessary to take the dogs out and retrieve my sun tea.  In my geeky curiosity, I decided to take its temperature:  110 degrees.

So how did I spend my air conditioned morning indoors?  By turning on my oven.  Now what kind of sense does that make?!  None whatsoever, not even to me.  But I have some newspaper articles I want to send to my dad, and I apparently feel the need to send him cookies every time I need to mail him something.

The cookie of choice today was chocolate chip.  The only chips I had left in the pantry were Ghirardelli Double Chocolate (60%) so I went ahead and used the recipe on the package.  It's worth pointing out that the recipe on the package is titled Ghirardelli Double Chocolate Chip Cookies, however, the recipe on their website under this title is totally different.  The recipe I used was what they list as Ghirardelli Chocolate Chip Cookies.  I did make a couple of changes though.  And instead of just printing the recipe, I thought I would do a pictorial this time.

I started with my dry ingredients.  I used 2 cups of all-purpose flour, 1/4 cup of natural cocoa powder, 3/4 teaspoon baking soda and 1/2 teaspoon salt.  I whisked this together and added 2 cups of the chocolate chips. 


Next I combined 3/4 cup packed brown sugar, 3/4 cup granulated sugar and two sticks of softened, unsalted butter.  Well, mostly softened since I hadn't planned ahead to take it out of the refrigerator last night.  It just took a little longer to cream with the sugars.


Lastly, I needed 2 eggs (also quasi-room temperature) and 2 teaspoons of vanilla extract.  I cracked the eggs into the measuring cup I used for the flour since I was going to have to wash it anyway.

The original recipe includes optional nuts, but since Dad can't chew them I left them out.


Once everything was ready to go, I turned the oven on to 375 degrees, plugged in the mixer and got started by creaming the butter and sugars on medium high speed. 

As I said, my butter was still slightly chilled, so the creaming process took a little longer than it normally would, probably a full 7 minutes with stopping and scraping a couple of times (I'm really big on scraping.)


Lower the speed to medium, and add the eggs one at a time.  Mix after each egg until the batter no longer looks curdled.  I actually ended up adding a white, a yolk and then the remaining whole egg just because that's how it came out of the cup.


Then add the dry ingredients and chips on low speed.  At this point the mixer will sound like it's driving down a bumpy road.  Mix only until the dry ingredients are combined.  Any strays can be worked in with a spatula or wooden spoon.


At this point, the cookie dough smells amazing.  I almost ate some raw.  Almost.  I have a thing about eating raw egg products.


 I used the biggest cookie scoop I have to portion these.  I knew with using all butter and no shortening the cookies would spread a lot, so I left plenty of room.

(Normally I am completely anti-shortening, but it does have its place in cookies.)


Bake for 9 - 11 minutes.  I split the difference and baked them 10 minutes for chewier cookies.  Remove immediately to a wire rack to cool completely. 


Let the pan cool a bit (or use two pans) and repeat until all the dough is used.  Since I had most of the counter space taken up with cooling racks and other appliances, the utensil drawer made a handy spot to let the cookie sheet cool. 

The recipe says it makes about 4 dozen, but with the size I made them I ended up with about 3 dozen.  And that last sheet of cookies had some seriously large cookies.  I think perhaps I'll keep those for myself.