Friday, September 30, 2011

Farewell to Peaches – Welcome Apples

The peaches I became so fond of over the summer are now gone and the orchards are brimming with apples.  As pleased as I was with my previous attempt at applesauce (the brown sugar cinnamon), I decided I wanted to try something a little different.  I stopped by Flamm Orchard on Wednesday and picked up two bags of apples:  Golden Delicious and Jonathan. 


For this batch of applesauce I chose, for no particular reason, to make the sauce with equal amounts of both varieties of apples. 


The plan was to roast the apples and caramelize the sugar before adding it to the sauce.  My thoughts on roasting the apples were that they would get that nice, roasted flavor (they didn’t) and if I roasted them with the peels on the peels should come off easily after roasting (they didn’t).  In retrospect, I don’t think I roasted them long enough.


It took me nearly an hour to separate the apples from their peels.  The only positive of this endeavor was that roasting the Jonathans with the skin on gave the apples a beautiful, rosy color.  I can’t say in the end the color was worth the effort, but it was a consolation at the time.


As for caramelizing the sugar, I’ve done this only a couple of times before:  once successfully, once not so much.  To help ensure this attempt would be successful, I consulted my Baking and Pastry textbook.  I used the “dry method” of mixing a small amount of lemon juice with the sugar and cooking it just until melted and golden.


I knew that when I added the melted sugar to the applesauce it would seize and harden immediately.  Since the sauce still needed to cook, the liquid and heat would re-melt the hardened caramel into the sauce.  I had hoped the caramelization would impart sort of a “caramel apple” flavor to the sauce but in keeping to the apparent theme of the day – it didn’t. 


While this batch of applesauce didn’t turn out as well as I envisioned, it’s still pretty good and I’m not giving up on the recipe/method just yet.  I still have plenty of apples to try again.  If at first you don’t succeed . . .


Monday, September 26, 2011

Versatile Pâte à Choux

Yesterday it rained.  All day.  And while the cool, dampness began stirring within me the desire to turn on the oven, the desire to curl up on the sofa with a good cookbook and a marginally interesting movie was stronger.  Today, the sun is shining.  It’s a gorgeous day.  And I turned on the oven.  It was time to make some éclairs.  I’ve been thinking about these since making the vanilla-orange curd last week.  Today was the day to put thoughts into action.

The pastry part of the éclair is made from pâte à choux, which to me seems to fall somewhere in between a batter and a dough.  I don't know why I don't use it more often, because it's truly such a simple dough to produce such elegant results.  Pâte à choux is used not only for éclairs, but also for cream puffs, profiteroles and gougeres.  As a side note, I had to look up the difference between cream puffs and profiteroles.  Profiteroles are essentially miniature cream puffs which may have a sweet or savory filling.  Gougeres are piped in the same manner as cream puffs, but have cheese (traditionally Gruyere) and black pepper added to the dough, and are not typically filled.

The recipe I used for pâte à choux today is the one we used in school.  Because of that, the ingredients are by weight versus volume.  The volume measurements I have provided in parentheses may not be 100% accurate, but should be close enough as to not affect the final product.  Also, some recipes add sugar.  The recipe I previously used from Amy Finley calls for sugar.  Either is fine.  You’ll probably have better browning with the sugar.  I think I may one day try pâte à choux in terms of a ratio:  one large egg to each ounce of milk, water, butter and flour.  That would certainly make it easy to remember, providing that it works.
 
An important note on the quantity of eggs:  you may not need the entire 12 ounces of eggs.  Ambient humidity and the amount of evaporation while cooking can affect the dough and how much egg it will require.  Make sure to read the recipe through before beginning.  The recipe can easily be cut in half, keeping in mind that half of 1/4 cup is usually 2 tablespoons.

Pâte à Choux
6 oz (3/4 cup) milk
6 oz (3/4 cup) water
6 oz (3/4 cup or 1-1/2 sticks) unsalted butter, cubed
Pinch salt
6-1/4 oz (1-1/4 cups) all-purpose flour, sifted
12 oz (6 large) eggs, beaten 

Combine the milk, water, butter and salt in a saucepan and bring to a boil over medium-high heat.  Remove the pan from the heat, add the sifted flour all at once and stir vigorously with a wooden spoon until it forms a dough.  Reduce the heat to medium and return the pan to the heat.  Cook and stir the dough for 30 to 60 seconds or until a film begins to form on the bottom of the pan. 

Transfer the dough to the bowl of a stand mixer fitted with the paddle attachment.  Mix on medium speed for about one minute to cool the dough.  Gradually begin adding the beaten egg in a thin stream, adding no more than a tablespoonful at a time.  The mixture will look “curdled” throughout much of the process.  Whenever that happens, stop adding egg and mix until it smoothes out. 
The "droop" test for medium peaks.
At the point when the dough begins to look more like a thick batter, stop mixing.  Scrape the sides and paddle and test the consistency of the dough by quickly dipping a spoon in the dough.  Hold it upright.  If the dough stands straight up, you’re at stiff peaks and more egg needs to be added.  The goal is medium peaks, which is where the dough will stand up but the very tip will droop slightly.


For éclairs:

Preheat oven to 425°F.  

The narrow space is for spacing in
between the rows of piped eclairs. 

Transfer the pâte à choux to a pastry bag fitted with a large round tip.  I use Ateco 806.  You can also use a large star tip, but I prefer the more traditional, smooth tops.  On a parchment lined baking sheet, pipe the éclairs about three inches long and two inches apart.  I like to rule my parchment on the back to make sure I'm keeping the size consistent.  To keep from having a pointy end, release the pressure on the piping bag while quickly pushing the tip upward toward the piped éclair.  (This probably makes more sense when you look at the picture.)  After the éclairs are piped, run the tip of a sharp knife down the outside edge of each éclair.  Be careful not to cut too deeply.  This will help the éclairs keep their shape. 

Finishing the eclairs.


Bake the éclairs for 10 – 12 minutes, or until golden brown.  Cool slightly and then pierce each end with a skewer to make holes for the filling.  Allow to cool completely before filling.  The éclairs can be filled with pastry cream, curd or stabilized whipped cream using a piping bag fitted with a small star tip.  When filled, dip the tops in melted chocolate (or drizzle the chocolate over them).  The full recipe of pâte à choux makes approximately five dozen mini éclairs.


For gougeres:

Preheat oven to 400°F. 


Placing the pastry bag in a cup with the tip folded will
help keep the batter/dough from oozing out of the tip.
When the pâte à choux reaches the proper consistency, add one cup of finely grated cheese (traditionally Gruyere, but I prefer Parmigiano-Reggiano) and coarsely ground fresh black pepper to taste.  Transfer the pâte à choux to a pastry bag fitted with a large round tip, such as Ateco 806, and pipe quarter-sized mounds of dough about an inch tall.  Use the back of a spoon dipped in water to flatten out the peaks. 

Bake the gougeres 14 – 16 minutes or until golden brown.  Remove from the oven and let cool slightly.  When cool enough to handle, use a skewer to poke a small hole in the bottom (to release steam) and transfer to a wire rack.  I think these are best served warm, so if necessary reheat them in the oven before serving.  The full recipe of pâte à choux makes approximately five dozen gougeres.


The finished eclairs filled with vanilla-orange curd and drizzled with white chocolate.

The finished gougeres.  I thought it would be nice to do something savory for the hubs.


Monday, September 19, 2011

The Whites and the Yolks

My friend, Alicia, asked me to do the cake for her sister's bridal shower.  It was to be a white cake with a layer of strawberries in the middle and white chocolate buttercream with white chocolate shavings.  For 80 people.  It was a big cake.
The cake's design was inspired by the shower invitations (the graphic flowers)
and the bride-to-be's china pattern (Lenox "Chirp").

I don't mind doing white cake, but for that much cake I really have to find use for the remaining egg yolks.  All 28 of them.  Throwing them out is simply not an option.

Over the last couple of days I've discovered it's easier to find recipes (that I can actually use anyway) that require only egg whites versus only egg yolks.  My go-to recipe for egg yolks is curd.  So this morning I used close to half of the yolks made about a quart and a half of vanilla infused orange curd. 

The recipe I started with was from Martha.  Of course, we all know I'm not the best at following recipes.  Before I even started, I knew I would be substituting ingredients to use things I already had on hand. 

The recipe calls for cooking the egg yolk mixture in a heavy pot over direct heat.  Much like jams and jellies, curd is not something you casually turn your back on.  As such, I tend to lean toward the side of caution and always use the double boiler method when I make curd.  In this case, I used the mixer bowl of my Kitchen Aid so when the mixture was cooked, I could put the bowl back on the mixer and let it whisk while I added the butter.  Lazy?  Perhaps.  But I prefer to think of it as "working smarter, not harder" - a favorite quote of one of my instructors. 

The brown sticks floating in the egg mixture are two left over pods from vanilla beans scraped for the cake.  I cut them up so they wouldn't be getting caught up in the whisk.  I did pull them out before whisking in the butter.  It would have been nice to show you pictures of the curd coming together as the butter is added in the mixer; however, I'm not coordinated enough to add butter with one hand and try to photograph with the other.  Being one's own photographer has its limitations. 
Because I like the bits of orange zest in it, I chose not to strain the curd.  I usually only strain if I've not been paying attention and have bits of scrambled yolk that need to come out.  And now what am I going to do with a quart and a half of orange curd?  I believe it's going to make a fine filling for some cupcakes.  Or maybe I'll try it as a filling for some mini eclairs topped with white chocolate.  Beyond that, I'm going to try to not just eat it with a spoon.

Vanilla Orange Curd
12 large egg yolks
1-1/2 cups sugar
2 Tbs orange zest
6 Tbs orange juice concentrate
4 Tbs water
5 Tbs lemon juice
1 vanilla bean, split and scraped
2 sticks plus 5 Tbs unsalted butter, cold, cut into small pieces

Combine the egg yolks, sugar, orange zest, orange juice concentrate, water, lemon juice and vanilla bean in the top of a double boiler set over medium-high heat.  Whisk to combine.  Cook 8 to 10 minutes, whisking constantly until the mixture starts to thicken, then switch to a heat-proof spatula.  Continue to cook and stir until the mixture is thickened and reaches 160°F.  Be sure to scrape sides of the bowl while cooking.  

Remove the bowl from heat.  Remove the vanilla bean pod and discard.  Transfer the bowl to the stand mixer fitted with the whisk attachment and whisk on medium speed.  Add the butter continuously, one piece at a time, until all of the butter is incorporated.  Whisk 2 – 3 minutes more on medium high speed to cool the curd.   If desired, strain through a fine sieve into a bowl or covered container.  Cover with plastic wrap, pressing it directly onto the surface of the curd to prevent a skin from forming.  Refrigerate until chilled and very firm, at least 2 hours or up to 10 days.


Tuesday, September 13, 2011

Happily Ever After

Eight years ago today, I married my true love.  To be honest, our decision to get married was more practical than romantic.  We were thinking about insurance, legal decisions, etc., and really didn't think a piece of paper would change how we felt about each other.  But somehow it did.  And in the best of ways. It turns out it's more than just a piece of paper after all.  Sometimes it seems like it was just yesterday and sometimes it seems like we've always been married.  That's one of the things that's so great about it. 


We chose to be respectful and not smear cake all over each other's faces.

To celebrate this evening, I won't be cooking a gourmet meal or making an amazing dessert.  We won't be going to a movie or to a fancy restaurant.  We will do what we've done every September 13th for the last eight years:  we'll go to Steak 'n Shake. 

I get a lot of strange looks when people ask what we're doing for our anniversary and I tell them we're going to Steak 'n Shake.  There is a story behind it, of course.

The hubs and I are casual people and kept our wedding as such.  We were supposed to have an outdoor ceremony.  It rained.  This wasn't the end of the world as we had planned for it and simply moved our ceremony into the room reserved for the reception.  After our ceremony, we chose to eschew the traditional receiving line and asked our guests to enjoy the buffet, remain comfortably seated and we would come around to each table (it was a relatively small wedding).  This worked very well for us and it seemed as though everyone enjoyed themselves. 

The problem was that we spent so much time talking to our guests, we didn't get to sit down to eat.  By the time all the guests had left, the staff had already taken down the buffet and we were starving.  So in the wee hours of the morning (technically September 14th) we went to Steak 'n Shake. 

Gourmet?  No. 

Elegant?  Not so much. 

Romantic?  To us - completely!

Happy Anniversary, my beautiful HJ. 
I love you with all my heart!

Tuesday, September 6, 2011

One Cake Down, One to Go

Earlier in the year, I had agreed to do a small wedding cake and cupcakes for a couple referred to me by a classmate from culinary school.  The wedding was September 3.  Of course at the time we had made these arrangements, I had no idea that my personal life would suffer the losses that it did.  I think that made me more vulnerable than usual.  While it's usual for me to get stressed when I'm doing cake for someone else, it was on the extreme side this time.  When I'm doing something that is so personal - for me and the other person - it causes self-doubt to creep in.  It didn't creep in this time so much as hit me like a linebacker.  This small cake gave me as much difficulty as it did doubt. 

The beginning of the candy clay acorns.

Despite the unseasonably warm temperatures, it was a fall-themed wedding.  Who knew in April it would be 100 degrees in September?  The bride wanted about five dozen cupcakes with fall-themed decorations and a small white cake to cut.  We agreed on peanut butter cupcakes with chocolate ganache, cappuccino cupcakes with mocha buttercream and pumpkin spice cupcakes with cream cheese buttercream.  She also wanted the cake to be peanut butter with ganache filling.  She liked the look of fondant, but not the taste; so my plan was to cover the cake with white candy clay.  I've used chocolate candy clay to cover a cake before and it worked beautifully.  White candy clay did not.  I finally made a judgment call and went with straight buttercream.  This presented problems of it's own as you must be very careful not to make marks in the buttercream once you have it smoothed.  And you have to figure out how to fix it when you have a decoration fall off and leave a big divot.
  
These leaves ended up getting tossed. 
The gold color I was using beaded
up on the candy clay.
I can't say the icing was perfectly smooth.  Sometimes it's necessary to recognize that trying to fix it can only make it worse.  At least I had sense enough to realize that.

Going with the buttercream presented another problem as well.  My original plan was to make small, leaf-shaped tuiles in fall colors to have sort of a "leaf pile" on top of the cake.  (The bride didn't have a topper.  My instructions were "make it pretty.")  Given that the tuiles would likely absorb moisture from the buttercream, I needed a plan B there as well.  Honestly, I struggled with this one.  Finally I decided to use some of the uncooperative candy clay to make ribbon roses.  Ribbon roses are not my favorite decoration.  I prefer more realistic flowers, but there simply wasn't time.  And since ribbon roses are not my favorite decoration, I'd not made them before.  I'm sure they could have been better.  My lack of experience and the fact that just the heat from my hands made the uncooperative candy clay even more so was problematic, but this is mere hours before delivery so it was time to just make it work.  I had shortened my deadline because I wasn't aware of what the set up was going to be and needed to make sure I had enough time to set up and be gone before the wedding party arrived.  I made my deadline, didn't get lost, and even got it all delivered and set up intact.  And most of the anxiety was dismissed after I received a wonderful follow-up note from the bride.


These are the cappuccino cupcakes with mocha buttercream and the finished candy clay acorns.   It's quite possible these are my favorite cupcakes. 


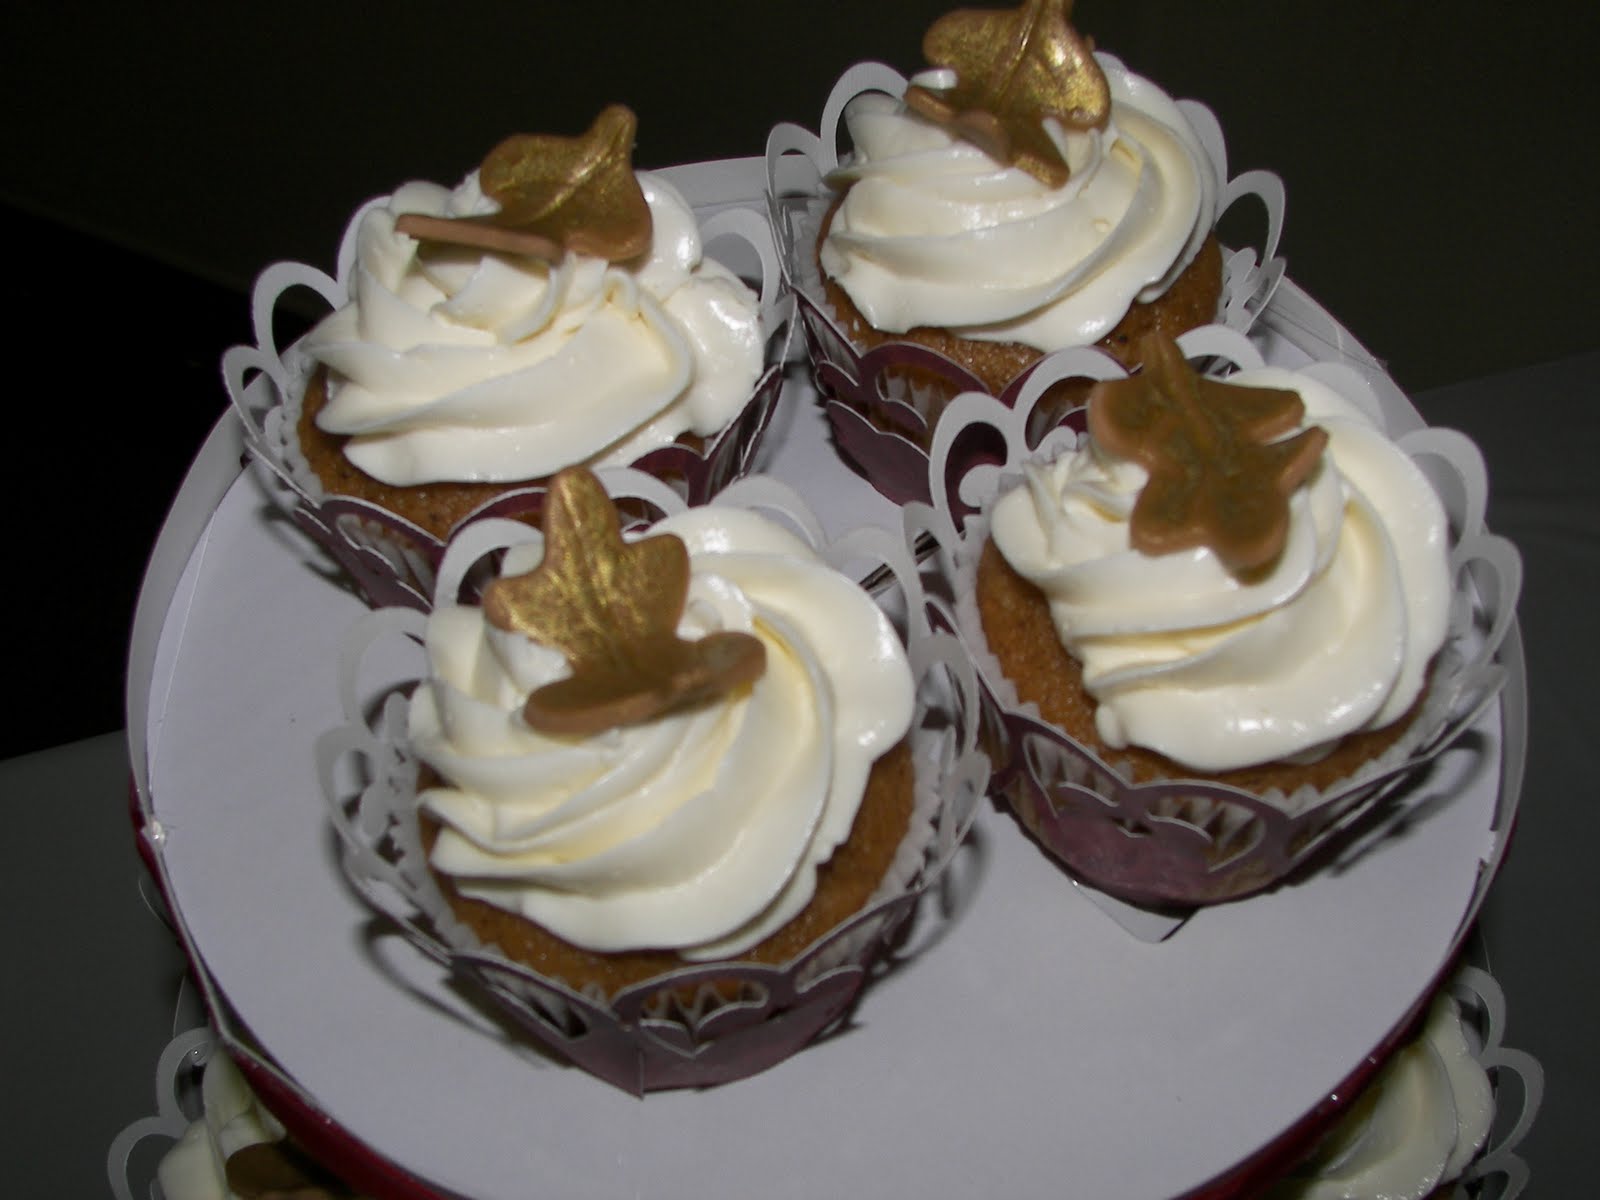
Pumpkin spice cupcakes with cream cheese buttercream (not the sickly sweet stuff) and edible gold painted fondant leaves.


Peanut butter cupcakes with chocolate ganache underneath a candy clay maple leaf.


The wedding cake with vanilla buttercream, candy clay roses and leaves, fondant ribbon and initial plaque.  By the time I was finished with this cake, I was a nervous wreck and swearing I wouldn't do any more cakes.  Except the one I promised my friend, Alicia, I would do for her sister's bridal shower.  For 80 people.  On September 18.  Occasionally, I am a glutton for punishment. 

Cappuccino Cupcakes
¼ cup Kahlua or other coffee liqueur
cup instant coffee granules
¾ cup whole milk
3 cups all-purpose flour
1 tsp baking powder
½ tsp baking soda
1½ cups unsalted butter, softened
2 cups granulated sugar
1 tsp pure vanilla extract
½ tsp salt
5 each large eggs
  
Preheat oven to 350°F.  Prepare muffin tins with paper liners.  

Microwave the liqueur and ¼ cup milk until warm in a glass measuring cup.  Add instant coffee and stir until coffee dissolves, reheating as necessary.  Watch carefully – it will boil quickly!!  Add enough of the remaining milk to equal 1 cup of liquid and set aside. 

In a medium bowl, sift together flour, baking powder and baking soda. 

In a large electric mixer bowl, beat butter until soft.  Add granulated sugar, vanilla and salt and beat until light.  Lightly beat eggs in a large measuring cup.  Add eggs approximately two tablespoonfuls at a time beating well after each addition.  Stop to scrape the bowl and paddle halfway through.  

Scrape the sides of bowl and paddle.  Add flour mixture into butter mixture alternately with coffee liquid, beginning and ending with flour.  Using an ice cream scoop, fill muffin tins approximately ¾ full.  

Bake 18 – 20 minutes or until toothpick inserted in center comes out clean.  Remove from oven and cool in pan on a rack 5 minutes.  Remove cupcakes from pan and cool completely on a wire rack. 

If you don't want to use alcohol in this recipe, just use very strong coffee or espresso.

Makes approximately 36 cupcakes.

Mocha Buttercream
1-1/2 cups granulated sugar
1 Tbs instant espresso
3/4 cup whole milk
1-1/2 Tbs all-purpose flour
1-1/2 tsp natural cocoa
1/4 tsp salt
1 Tbs vanilla extract
6 Tbs heavy whipping cream
2-1/2 cups unsalted butter, cubed, room temperature

Heat the milk, sugar and instant espresso over medium low heat in a heavy bottomed pan until the sugar dissolves.  Remove the pan from heat and gradually sift in the flour, cocoa and salt while whisking until smooth.  Cover with plastic wrap directly on the surface and refrigerate for at least 30 minutes to cool.  After the mixture is cooled, whisk in the vanilla extract.

Pour the cooled milk/sugar mixture into the bowl of a stand mixer fitted with a paddle attachment.  On low speed, add the cream and butter cubes.  Continue mixing on low for about 30 seconds to incorporate the butter.  Gradually increase the speed to medium high (about 8 on a KitchenAid).  The buttercream will start to look curdled.  It’s okay – don’t panic!  Just keep going; it’s nearly impossible to overbeat this icing.  Beat for 8 – 10 minutes or until the buttercream is smooth and creamy.  It will happen.

This is definitely a fair-weather icing; it does not hold up particularly well in warmer temperatures.