Although we didn't get a white Christmas,we got a white day after Christmas. And a little more white three days after Christmas. This is what it looks like from my corner of the world:

Saturday, December 29, 2012
Thursday, November 8, 2012
His and Hers Risotto
While there is an exhaustive list of things Tug and I have in common; we have our differences, too. One of the areas where that's most prevalent is what we (want to) eat. We could both be considered picky eaters, but in vastly different ways. At home, he would be perfectly happy with meat and potatoes every night, with pizza on occasion. But take him to a restaurant near any coast and the man will eat anything that comes out of the water. Growing up landlocked, I'm not as adventurous, but I do get a little bored with the meat and potato routine. I like to try new and different things once in awhile.
Friday, November 2, 2012
Pumkin Gooey Butter Cake
Continuing with my apparent theme of fall flavors, pumpkin gooey butter cake had been on my mind for awhile. Several years ago I made Paula Deen’s version; but given that I haven’t purchased cake mix in over four years, I needed a new recipe. While I was in the process of trying to come up with my own “cake mix” recipe, my friend, Tracie, found this recipe for from scratch pumpkin gooey butter cake for me. Did I follow it? Not exactly, of course.
Sunday, October 21, 2012
Apple Cider . . . Donuts?
Over the summer I purchased a couple of mini-donut pans thinking I would use them for a recipe my mom sent me (which I still haven't). For at least a month, I've been staring at a recipe for apple cider donuts that I wanted to try. After some tweaking to the recipe to avoid special order ingredients, I finally made the donuts.
Wednesday, October 3, 2012
Whoop(s)ie Pies
Since returning to work, I find that I don’t have much time for keeping up with the blog right now – my own nor others’ I like to follow. I miss it; but sometimes life forces us to prioritize (first world problems). I still manage to catch glimpses of what comes through my e-mail and make mental notes of what I want to try.
Tuesday, August 28, 2012
Transitions
While it's been very quiet here on the blog, life couldn't be more opposite. You should have been reading about the Daring Bakers' challenge on Monday; however, for my sanity I really needed to opt out this month. August is nearly over and I barely remember it beginning. I would like to tell you my days have been filled with gardening, reading and baking, but nothing could be further from the truth.
At the end of June, Tug and I discussed me returning to work. (I've mentioned before my problem with contributing only to expenses and not income.) We both agreed it will be a big adjustment, but he supported my decision. Fortunately, I could be flexible in terms of full-time, part-time, salary, etc. Tug was very specific that I should only accept an offer of employment if I was completely comfortable with it.
So in early July, I began taking Civil Service exams to return to work at the university I left four years ago. This is a public university and as such, is a state entity. That means nothing. happens. quickly. Especially the employment process.
Instead of gardening, reading and baking in August, I've been updating my resume, trying to figure out which pieces of my pre-culinary school work wardrobe still fits, shopping for replacements and going on interviews. I've had four. I received three offers of employment.
The first interview and offer was in the department I left four years ago. I honestly felt that returning to that department would cause some very hard feelings with the person who is now doing the job I had. And since the responsibilities of the position I was offered sounded beyond monotonous, I declined the offer. There is much to be said for the luxury of choice.
There was no offer of employment from my second interview and that didn't upset me at all.
The third interview was in a very desirable area of the university. It went well despite my being at a total loss and stumbling when asked, "How would a former supervisor describe you?" I'm not comfortable speaking as to others' opinions of me. I was still offered the position, however.
I was set to accept this offer pending university approval. Then I was notified I was eligible to interview for another position. Since the approval for other position was still pending and there are no guarantees until the contract is signed, I accepted the interview. The next day I was offered the position. While my initial thought was that I would be happy with either position, the tension ache in my left shoulder was trying to tell me otherwise. I listened. I accepted the offer from my fourth interview and start on Thursday. The pain in my shoulder is gone and I'm excited about my first day instead of anxious.
Without a doubt, there will be days when "what was I thinking?!" will pass through my thoughts. I know I will miss the freedom of being a homemaker. But I also know it will be good to get out of the house, learn to manage my time again and meet new people. And there will be a very satisfying feeling upon receiving that first check.
Things will probably remain fairly quiet around here for awhile as I adjust to my new schedule. I hope you'll stay tuned with me to see how it all works out.
 |
| Totally unrelated to this post, but I think thistles are beautiful. Must be the Celt in me. |
While it's been very quiet here on the blog, life couldn't be more opposite. You should have been reading about the Daring Bakers' challenge on Monday; however, for my sanity I really needed to opt out this month. August is nearly over and I barely remember it beginning. I would like to tell you my days have been filled with gardening, reading and baking, but nothing could be further from the truth.
At the end of June, Tug and I discussed me returning to work. (I've mentioned before my problem with contributing only to expenses and not income.) We both agreed it will be a big adjustment, but he supported my decision. Fortunately, I could be flexible in terms of full-time, part-time, salary, etc. Tug was very specific that I should only accept an offer of employment if I was completely comfortable with it.
So in early July, I began taking Civil Service exams to return to work at the university I left four years ago. This is a public university and as such, is a state entity. That means nothing. happens. quickly. Especially the employment process.
Instead of gardening, reading and baking in August, I've been updating my resume, trying to figure out which pieces of my pre-culinary school work wardrobe still fits, shopping for replacements and going on interviews. I've had four. I received three offers of employment.
The first interview and offer was in the department I left four years ago. I honestly felt that returning to that department would cause some very hard feelings with the person who is now doing the job I had. And since the responsibilities of the position I was offered sounded beyond monotonous, I declined the offer. There is much to be said for the luxury of choice.
There was no offer of employment from my second interview and that didn't upset me at all.
The third interview was in a very desirable area of the university. It went well despite my being at a total loss and stumbling when asked, "How would a former supervisor describe you?" I'm not comfortable speaking as to others' opinions of me. I was still offered the position, however.
I was set to accept this offer pending university approval. Then I was notified I was eligible to interview for another position. Since the approval for other position was still pending and there are no guarantees until the contract is signed, I accepted the interview. The next day I was offered the position. While my initial thought was that I would be happy with either position, the tension ache in my left shoulder was trying to tell me otherwise. I listened. I accepted the offer from my fourth interview and start on Thursday. The pain in my shoulder is gone and I'm excited about my first day instead of anxious.
Without a doubt, there will be days when "what was I thinking?!" will pass through my thoughts. I know I will miss the freedom of being a homemaker. But I also know it will be good to get out of the house, learn to manage my time again and meet new people. And there will be a very satisfying feeling upon receiving that first check.
Things will probably remain fairly quiet around here for awhile as I adjust to my new schedule. I hope you'll stay tuned with me to see how it all works out.
Wednesday, August 1, 2012
Black Velvet . . . if you please
To the song and to the whisky, I would say, “no thanks.”
This is neither.
Last Sunday Tug and I went to our local big box warehouse store to stock up on some essentials (mainly coffee). Going in, I had some concerns as they always have fruit, and usually have something unusual that I feel I must have. I was determined not to succumb to my fruit for jam addiction. This shopping excursion taught me that I have an enabling husband. We came home with three more pounds of dark cherries and something totally new to me – Black Velvet apricots.
Friday, July 27, 2012
Crack(er)ing Up
While I’m ordinarily one of the last ones to finish my Daring Bakers’ challenges, this time I was among the first. There was a possibility I would be returning to full-time employment in July so I wanted to do my challenge baking while I knew I would have time. Unfortunately, that meant baking while the thermometer hovered somewhere around 104°F. But the motivation was there, so I went with it. By the time I was done, Satan would have felt at home in our kitchen.
Tuesday, July 24, 2012
Giving
With the abundance of produce right now, I've gone slightly majorly overboard with making jams and jellies this month. As if I didn't already have enough, I canned 24 more jars today. The shelf I have designated for my preserves is not going to be able to withstand the weight of all of these jars (more than 50). I mentioned previously that some will be gifted to friends. And I've also decided to gift some to one of you.
Monday, July 16, 2012
Jamming and Canning
Saturday was National Can-It-Forward Day. While I am a canning enthusiast, this isn’t something that I sign up for or, realistically, to which I pay much heed. For the last two years, however, it seems like I end up canning on Can-It-Forward Day without premeditation.
Sunday, July 8, 2012
July Garden Update
A couple of days ago I received a comment on June Garden Update that made me smile. Within this comment, the author professed to a "black thumb" and indicated that, given my container garden, I would now "have someone to gloat over". Beyond that fact that it's not really my style, it's very easy to resist any temptation to gloat. This is why:
Wednesday, June 27, 2012
Battenberg Up
When I read this month’s Daring Baker’s challenge, I was kind of excited that it was cake. "Mandy of What The Fruitcake?! came to our rescue last minute to present us with the Battenberg Cake challenge! She highlighted Mary Berry’s techniques and recipes to allow us to create this unique little cake with ease." It’s been awhile since I’ve made a cake and I’ve been feeling the urge a little bit. This cake was the perfect answer as although it’s small in size, it involves a lot of technique. Perfect!
Thursday, June 7, 2012
One of Those Days
Do you ever have them? Those days that, at some point, you realize the most challenging thing you should have endeavored was changing the channel? Apparently, today was my day. C’est la vie.
Sunday, June 3, 2012
June Garden Update
It’s been 10 days since I took the photos of my container garden for Almost a Garden. Every day when I walk out onto our deck I am amazed at what can happen in 24 hours, let alone 10 days. See for yourself:
Saturday, June 2, 2012
Homemade Yogurt Unplugged
Back in April, Marisa of Food in Jars posted about making homemade yogurt in mason jars. I was enthralled. For years – Y E A R S – I’ve looked at yogurt making machines. Part of me felt it would be a justifiable expense as I do eat quite a bit of yogurt and the idea of experimenting with different flavors was intriguing. But then I would read further about needing to order and reorder the yogurt cultures, think about the cost of having everything shipped, and the fact that it would be a single-use machine and eventually would talk myself out of it.
Sunday, May 27, 2012
Happy Challah Days!
First things first, let me get the required verbiage in before I forget - again:
May’s Daring Bakers’ Challenge was pretty twisted – Ruth from The Crafts of Mommyhood challenged us to make challah! Using recipes from all over, and tips from “A Taste of Challah,” by Tamar Ansh, she encouraged us to bake beautifully braided breads.
Okay, that taken care of, this was my first attempt at challah. We were supposed to make it in school, but somehow didn’t get to it. Making the dough itself isn’t much different than making any other enriched bread dough. However, because it’s a traditional Jewish bread, there are certain dietary rules to be kept in mind if you’re keeping your challah true to tradition. This usually means no dairy in the bread. Ruth provided some great information about the history of challah and what the different braids and shapes symbolize. (She also included videos of braiding techniques which I tried to watch, but since my laptop doesn’t seem to like video I finally gave up in frustration.) Of the recipes provided, I went with the Easy Challah mostly because it was a smaller quantity. I do want to try the recipe for Honey White Challah at some point though. It sounds really good and my braiding skills can use a lot more practice.
Friday, May 25, 2012
Almost a Garden
After an unsuccessful attempt at starting age-old seeds back in January, my second attempt with new seeds was a little too successful. I ended up giving about half of my seedlings to our former neighbor for his garden. The remaining seedlings have been transplanted to pots, and this what I have now:
Monday, May 14, 2012
Brioche and Preserves
This morning I got up early to get the mini ganache-filled peanut butter brioche loaves shaped, proofed and baked before it got too hot. I shaped and filled them using the same method as the chocolate-filled chocolate brioche, just spreading a thin layer of ganache over two-thirds of the dough. While it was tempting to slather on the ganache, I knew it would just ooze out and make a mess once the dough was rolled up.
Saturday, May 12, 2012
Produce Projects and Brioche
Produce Projects:
Last week I got a little carried away at the farmer’s and produce markets. I came home with strawberries, cherries, rhubarb, ginger and coconuts. There were definite plans for each of my purchases but I knew it would take awhile to get everything done.
Saturday, May 5, 2012
A Good Day at the Market
Every Saturday, April through November, the Farmer’s Market sets up in the parking lot of a small strip mall. While I don’t make it every Saturday, I am managing to go more this year than last. (That’s not difficult seeing as we only made it once last year.) Tug and I usually saunter in around 10:00 a.m., do a walk through and decide what we’re going to get. Today, I got up early so I could be there at 8:00 a.m. to meet my friend, Terry. The plan was to scope out some of my competition for home-baked goods. The problem: none of my competition showed up this morning. That was disappointing, but I consoled myself with the fact that I got to see Terry and that this is what I brought home with me:
Thursday, May 3, 2012
Things I'm Afraid to Tell You
While perusing through my blog roll today, I read this post from Beth at Parsimonia. It was inspired by this post, which apparently started somewhat of a blog trend to use today to disclose things about ourselves we may not normally share. I debated, but figured, "why not?" You can trust me completely when I say that what you read below is far from inclusive; but, in no particular order, here are 10 things I would not normally disclose:
Saturday, April 28, 2012
A Busy Week in the Kitchen
This has been a busy week in our kitchen. There has only been one day that I wasn’t in the kitchen baking or cooking. It’s been a busy week, but a good week. It went something like this:
Friday, April 27, 2012
Daring Bakers Go Armenian
For April, Daring Baker Jason (of Daily Candor) challenged us to make at least one of two recipes he provided which represent his Armenian heritage: nazouk (or nazook) and nutmeg cake. Both were completely new to me and right away I had a strong suspicion I would make both of them.
Thursday, April 19, 2012
Chocolate-Filled Chocolate Brioche

This could also be called “the bread that almost wasn’t”. I measured out all of the ingredients to make it on Tuesday evening. Then I read about this chocolate and cherry filled brioche that Katie at Making Michael Pollan Proud made. I began wavering. I started rationalizing with myself. The internal chatter went something like this:
Sunday, April 15, 2012
Goat Butter Brioche and Sticky Buns
I have a fascination with making things from goat’s milk. There was a time if those words had been uttered in the same sentence I likely would have shuddered and made impolite facial expressions. Goat cheese was definitely an acquired taste for me, but now I absolutely adore it and even make it on occasion. Last year when I read an article about goat milk caramels being the darling of a Chicago food show, I immediately knew I had to figure out how to make them. I did and they’re amazing. I’ve used goat butter to make toffee. That wasn’t my favorite, but I’m pretty sure I can improve it.
Tuesday, April 10, 2012
Brioche Craqueline

Sunday, April 1, 2012
Graham Crackers and Candied Oranges
My fourth (and I’ve decided, last!) graham cracker test has left me somewhat disappointed. I was really hopeful that the recipe from the Flour cookbook by Joanne Chang would be the ultimate graham cracker recipe. I readily admit that I’m a little burnt out on graham crackers, but I didn’t care for these much at all. They’re actually called “graham wafers” in the cookbook, so perhaps I’m just not a fan of graham wafers.

This recipe was markedly different from the other three I tried in that it included egg, cream, cornmeal and baking powder (versus baking soda). The cornmeal seems to be what lost me. I love cornmeal for cornbread and polenta, but apparently not for graham crackers. It added an additional crunch and texture that I just didn’t care for. It seemed to be the deal breaker. That’s too bad since I have about three dozen of them.
So moving on in my recipe testing, and still from the Flour cookbook, I did some prep work for craqueline, a brioche-based pastry. The craqueline recipe in Flour is one the author adapted from her work at Payard. It’s composed of brioche dough wrapped around diced candied oranges and coated with a crunchy sugar and almond topping. I looked for some other recipes online for comparison and it appears this is Francois Payard’s French interpretation of a traditionally Belgian pastry. The original Belgian craquelin wraps the brioche dough around sugar cubes and citrus zest. Being a big fan of candied citrus, I’m going with the French version.
To get started, I needed to candy the oranges. Ms. Chang’s recipe calls for navel oranges, but I happened to have some beautiful blood oranges I had picked up with the intent of making a little more marmalade that I don’t need. I would imagine the navel oranges are recommended as they are seedless. I had to pick a few seeds out of the blood oranges, but not many. The process couldn’t have been easier, but is somewhat time consuming: make sugar syrup, boil orange slices in it for about two hours, let cool. And the results were gorgeous!

The recipe indicates the oranges can be made up to two weeks ahead and stored in their own syrup in the refrigerator. In proceeding to read through the recipe, it states to scrape the syrup off of the orange slices before chopping – and to discard the syrup. Never! The remaining blood orange syrup is beautiful and I think will be wonderful to have for some warm weather beverages. And since we’re having enough warm weather here to have turned our air conditioning on today, finishing the craqueline will likely wait for cooler temperatures on Thursday. That will also give me a chance to finish some gardening projects and take care of some homemaker things that tend to take a back seat to wannabe baker things!
Tuesday, March 27, 2012
Daring Bakers: Dutch Crunch Bread
Until this month, I had never heard of Dutch Crunch Bread. Living in small-town Southern Illinois, that’s not particularly surprising. If not for the Daring Bakers’ Challenge, I’m doubt I ever would have heard of it. Dutch Crunch is also known as tiger bread or giraffe bread because of the pattern of the crust after baking. The “crunch” is actually a topping applied to the bread (any bread) and not the bread itself.
 Most of the bread I make is sourdough. I considered other types of bread for this challenge as I wasn’t sure if sourdough would be a good match for the topping, but compromised by making a less tangy sourdough with a softer crust.
 Most of the bread I make is sourdough. I considered other types of bread for this challenge as I wasn’t sure if sourdough would be a good match for the topping, but compromised by making a less tangy sourdough with a softer crust.
Making sourdough bread has nearly become second nature to me. Since the Tea & Cookies sourdough challenge in February, I’ve made sourdough bread at least once a week, sometimes twice if I’m giving bread to friends. The recipe I use makes two loaves of bread. Honestly, I wasn’t sure if I wanted to put this crunch topping on all of the bread. What if I didn’t like it? Why waste perfectly good bread if I didn’t like the "crunch"?
 |
| the Dutch Crunch topping |
Although I’d only intended to make half of the topping recipe, I mistakenly measured the rice flour out for the full amount. I chose to adjust all of the other ingredients to the full amount since it would be quicker than starting over. Then I started to wonder if my active dry yeast was still good as I've forgotten how long I've had it. (My sourdough bread doesn't use yeast, and I ordinarily use instant when I need it.)
 |
| I'd say the yeast is still good. |
Mixing up the topping didn’t do anything to reassure me that I would like it. It smelled rather badly in my opinion – sweaty gym socks came to mind. All I could think was, “please, please, please don’t let it taste like it smells!” and “maybe baking gets rid of the smell.” But at least the yeast was still active.
 |
| one topped, one waiting |
The next step was to spread the smelly topping over the two small sourdough boules I was "sacrificing" for the cause. The instructions indicated to err on the side of too much topping versus too little. I spooned and spread the topping until I just couldn't stand to add any more.
Once the bread was out of the oven and slightly cooled, the first thing I did was smell the crust. While not as strong, it still smelled a little bit like sweaty gym socks to me. I wasn’t looking forward to the second half of the challenge: creating a sandwich using the bread.
 |
| it is rather attractive bread |
Tug had grilled chicken breasts for dinner the night before. They were so large that neither of us finished them, so grilled chicken was part of my sandwich. We also had a significant quantity of lettuce from our hydroponic garden that needed to be used. Then I remembered some goat cheese I had bought and not opened yet. And since I’m a big fan of goat cheese with citrus, my sandwich also included some of the preserved lemons I made earlier this month. Tug had no desire to try my sandwich and made his own chicken sandwich. I’ll admit, my sandwich isn’t for everyone.
 |
| It looks like a Dagwood, but I smashed it down to size. |
And in all honesty, Dutch Crunch Bread really isn’t for me. Eating it as part of my sandwich was fine, but at one point I pulled off a small piece of the “crunch” and ate it on its own. It does taste like I think it smells!
Friday, March 23, 2012
Measuring: Weight vs. Volume
“Do you prefer weighing out ingredients or measuring with measuring cups?”
The responses were pretty much evenly split between the two, with several people saying they use both. While I much prefer weighing, I actually use measuring cups as well since not all recipes are written for weight measurements. However, when I do make recipes using volume measurements, I try to weigh the measured ingredients and make notes so if I make the recipe again, I don’t have to get out the measuring cups.
Why do I prefer to use weight measurements?
Weighing is my preference mainly because it’s more accurate, especially when using grams. Beyond the fact that not all measuring cups are created equally or accurately, if you were to have ten people measure out a cup of flour and then weigh them individually, chances are they would all be different. And brown sugar! I’ve always experienced a degree of frustration at recipes that say “packed brown sugar”. Even when the recipe says “firmly” packed, just exactly what does that mean? If you’re using weight measurements, 100 grams of brown sugar is 100 grams of brown sugar whether you pack it down or not.
The other reason is this:
 |
| five measuring cups and a set of spoons |
In mixing up another graham cracker recipe to test this morning, I used all of these utensils. Now I will admit, there are a couple more in there than absolutely necessary, but since Tug bought me this awesome set of All-Clad odd-sized measuring cups and spoons (1-1/2, 3/4 and 2/3 measuring cups and 2 teaspoons, 1-1/2 and 2 tablespoons measuring spoons), I use them whenever possible. Had I started with weight measurements, I wouldn’t have used any of these. I’ll never give up my measuring cups and spoons, but if I can get by with fewer dishes to wash I’m all about it!
Thursday, March 22, 2012
Wading in the Shallow End
When I left my full-time job in 2008, I knew it was time for a change. I’d been working in offices since high school. Although I was confident in my skills and abilities in that environment, and my performance reviews told me I excelled at my work, it was work for which I had become completely dispassionate. The satisfaction and reward was next to non-existent. The point of burn out had been reached and it was reflected in my attitude.
So as my husband made the transition from doctoral candidate to Assistant Professor, I made the transition from being an employee of an educational institution to a student of one. I believe Tug made the transition much easier than I did. He was now among peers. I was a nontraditional student among a group of very young culinary students, most of whom were there because they thought they were going to be The Next Food Network Star. The first year, especially my first semester, was monumentally trying. The confidence I had previously had in my work was obliterated. But I made it.
Before leaving my job, many of my friends and colleagues would ask me what I was going to do when I was finished. Several of them suggested restaurants that were for sale, but that was never a consideration for me. I did very seriously consider catering. The more I learned in school, however, the more I realized that may not be for me either. When I was able to enroll in the baking and pastry courses in my second year, I started to feel my confidence returning. And when on one project I earned the highest score my instructor had ever given, I felt totally validated.
Since finishing my classes in 2010, I’ve vacillated on how to utilize my education. I started out baking and decorating wedding cakes and cupcakes. I still enjoy cake decorating, but it doesn't satisfy my soul and I began to feel restricted by it. I want to make more than cake. I want to experiment with flavors and textures, with savory as well as sweet. I began to think about a bakery. But how committed was I? To baking: totally. To the amount of debt that would be incurred: not at all. I’m practically allergic to debt. Back to square one.
I floundered a bit. I started the blog to try to justify my baking and preserving endeavors. I hoped some great epiphany would come along. And it did. Last year I learned of the Cottage Food Bill. This bill, if passed, would allow for certain home-baked items to be sold at farmers’ markets. The Governor signed the bill into law last summer, taking effect January 1, 2012. This is what I needed.
In January, not wanting to do anything on a whim, I started writing a business plan for what I call a “micro-business”. Last month, I attended a Starting a Small Business workshop. Next week, I’m meeting with a small business specialist to discuss my business idea and get assistance with finishing my business plan. I already know I won’t be prepared for the opening day of the farmer’s market this spring. My goal is for next April. It will probably take me at least that long to get through the recipes I want to test. The list I have selected is already 70+ and growing! (This is why I’ve been making so many graham crackers lately.) But in this case, the research and development is what I enjoy the most.
So I’m going to take a deep breath and wade right into the shallow end. The farmer’s market is only a six-month season, one day a week. But it will give me the opportunity to see how well my products will be received. It’s a small start, I know, but one with minimal risk and very little debt. Despite that, I still feel butterflies when I think about it. It’s ironic that confidence doesn’t come as easily when it’s something I’m so passionate about.
Sunday, March 18, 2012
Graham Cracker Recipe Test No. 2
While I considered another attempt at the Miette graham cracker recipe, I ended up deciding with five recipes to try I’d just move on and if none of the others were spectacular, I’d give it another go. Sorry, Miette, but I don’t think I’ll be coming back to your graham crackers.
 |
| from left to right: the decline of my patience |
The recipe I tested today is from One Girl Cookies by Dawn Casale and David Crofton. Although I wouldn’t use “charming” to describe this book, I love the personal stories and vintage family photos included. My only complaint (and this is totally a personal pet peeve) is that the recipes are solely in volume measurements. To compensate, I weighed out my ingredients as I measured them and made notes so next time I’ll be prepared. And I know that when testing recipes I should actually follow them, but I just can’t help myself. Instead of all-purpose flour, I used whole wheat pastry flour for more “graham-y” graham crackers.
 |
| the little holes were made with a No. 5 piping tip |
Even though the dough came together incredibly quickly, the rolling, cutting and baking seemed to take for-ev-er. After I rolled the dough between parchment sheets, I put it in the freezer for about 15 minutes to firm up before cutting. (I will confess that I was much more diligent about keeping the butter-based dough cool with this batch of graham crackers. Not a particularly easy task when our temperatures were in the lower 80’s today, the oven was on, and I just can’t bring myself to turn on the air conditioning in mid-March.) The biggest problem was the dough would only be out of the freezer for about a minute before it started to soften up and get sticky. I had to put the dough back in the freezer several times just to get the scraps out from in between the cut crackers. After getting one sheet of fluted rounds, I went with cutting rectangles. I thought being quicker, they would also be easier to work with. I was only half right.
 |
| believe it or not, the rectangles didn't save much time |
By the time I finished baking the two sheets of graham crackers, I was not feeling the love for finishing the scraps of dough. And having the oven on had made it even warmer - bordering on unpleasant. Given that, the last of the dough is rolled out between parchment sheets, wrapped in plastic and resting in the freezer. Maybe I’ll finish them tomorrow in the cool of the morning.
Comparing these graham crackers to my Miette graham crackers would be kind of like comparing fleur de sel to iodized table salt: they're not even in the same league. These graham crackers baked up light and crispy, and not a bit greasy. Their texture and crunch are really quite wonderful. I went with cinnamon instead of ginger this time. The cinnamon was barely noticeable in the background, but I think any less and it would have seemed like something was missing and any more would have been too much. I wish I would have remembered to sprinkle them with sugar, but it's a small thing. Overall, I definitely think this recipe is worth keeping, but maybe just made when cooler temperatures prevail. Cooler temperatures or not, my next graham cracker recipe to try is from Martha Stewart's Cookies. As much as I like Martha, her graham crackers are going to have to be pretty awesome to top these!
Homemade Graham Crackers
Recipe adapted from One Girl Cookies by Dawn Casale & David Crofton
315 g whole wheat pastry flour
40 g stone ground whole wheat flour
1/4 tsp kosher salt
1/4 tsp baking soda
1/4 tsp ground cinnamon
113 g unsalted butter, at cool room temperature (65 – 68°F)
100 g granulated sugar, plus extra for sprinkling
60 g brown sugar
1/2 cup water, cool but not cold
Sift the flours, salt, baking soda and cinnamon together over a medium bowl and set aside.
Cream the butter and sugars in the bowl of a stand mixer fitted with the paddle attachment for 3 – 5 minutes on medium speed. Stop and scrape the bowl and paddle. On low speed, add one-third of the flour mixture, followed by half of the water. Repeat, ending with the flour. Mix the dough just until the ingredients are combined, finishing with a rubber spatula. Use the spatula to turn and fold the dough a few times to “knead” it.
Divide the dough in half, keeping one half covered while working with the other. Place the dough between 12” x 16” sheets of parchment paper and roll out to approximately 1/8” thickness. Repeat with the remaining dough. Carefully place the rolled dough (still sandwiched in parchment) on a baking sheet and refrigerate for 30 minutes or freeze for 15 minutes.
Preheat the oven to 350°F. Line two baking sheets with parchment paper.
Remove one sheet of dough at a time from the refrigerator or freezer and place on a cutting board. Peel off the top piece of parchment paper. Cut the dough with cookie cutters or cut squares or rectangles with a ruler and knife, trying not to cut through the parchment. Grab the bottom piece of parchment and flip the cut dough over onto the cutting board. Peel off the remaining piece of parchment. Place the graham crackers on the prepared baking sheets and sprinkle lightly with the extra sugar. (The dough scraps can be re-rolled, chilled and cut in the same manner.)
Bake the graham crackers for 20 minutes, rotating the baking sheets halfway through. Cool on the baking sheets for five minutes and then transfer to a rack to cool completely.
Store in an airtight container.
Tuesday, March 13, 2012
Testing Recipes: Homemade Graham Crackers
 |
| Not all of these are recent purchases, but you get the idea. |
In the last month or so, I’ve bought at least eight new food-related books: cookbooks, baking books, cake decorating books. One of my (many) vices is buying cookbooks. And then never making a single recipe out of them. Not. One. Recipe. I can’t tell you how many cookbooks I have that I’ve spent countless hours looking at, but never cooking from. Since I was a little excessive on buying cookbooks lately, I figured I’d better use some of them.
Inspired by the graham cracker base of the marshmallow pinwheel cookies my dad likes, I’ve been thinking about an attempt at making homemade graham crackers for some time now. Given that I now have no less than four baking books with recipes for homemade graham crackers, I couldn’t see any reason not to try them.
The first recipe up at bat is from Miette. This is an absolutely charming cookbook from the San Francisco pastry shop of the same name. Unfortunately, it’s a cookbook riddled with errors. I downloaded the errata sheet from the publisher’s website, which is a full page long – and apparently not all inclusive.
Miette’s recipes include both volume and weight measurements. Apparently there were some difficulties with those conversions. Although the graham cracker recipe is not included on the errata sheet, I immediately noticed a problem. The ingredient list includes “2/3 cup (6 ounces) unsalted butter”. Do you already see the problem with that? Six ounces of unsalted butter is 3/4 cup. (I actually sent an e-mail to the publisher to point this out.) It’s a small amount, but in baking a small amount can make a big difference.
Despite the discrepancy, I proceeded with the recipe using six ounces for the butter, mostly because that was easier to measure. I felt this recipe great had potential for variations given the ingredients. The recipe called for 1-1/2 cups of all purpose flour and 1/3 cup of whole wheat flour. I used 1 cup of all purpose, 1/2 cup of whole wheat pastry flour and the 1/3 cup of whole wheat flour. I also used ginger in place of cinnamon.
The dough came together very easily. I wrapped it up in plastic and let it rest overnight. I let the dough rest at room temperature for about 10 minutes before rolling it out. That’s where things started to not go so well. It’s been unseasonably warm around here lately. The near record highs in the upper 70’s did not bode well for butter-based dough. Especially not butter-based dough with too much butter. I should have used the 2/3 cup measurement. I had to keep giving the dough brief time outs in the freezer just to be able to work with it.
Perhaps it was because of the butter, perhaps because of the temperature, perhaps a combination of the two, but what I ended up with was not what I had in mind for graham crackers. The taste was . . . okay, but not great. They were greasy. They were crunchy from too much sugar, but not crispy. These were definitely not worth the amount of time spent on them.
 |
| I made shamrocks (and stars) since Saturday is St. Patrick's Day. |
Perhaps if this recipe makes it to the errata sheet, I’ll try it again. In the meantime, my next graham cracker recipe on deck is from One Girl Cookies. I’m keeping my fingers crossed.
Monday, March 12, 2012
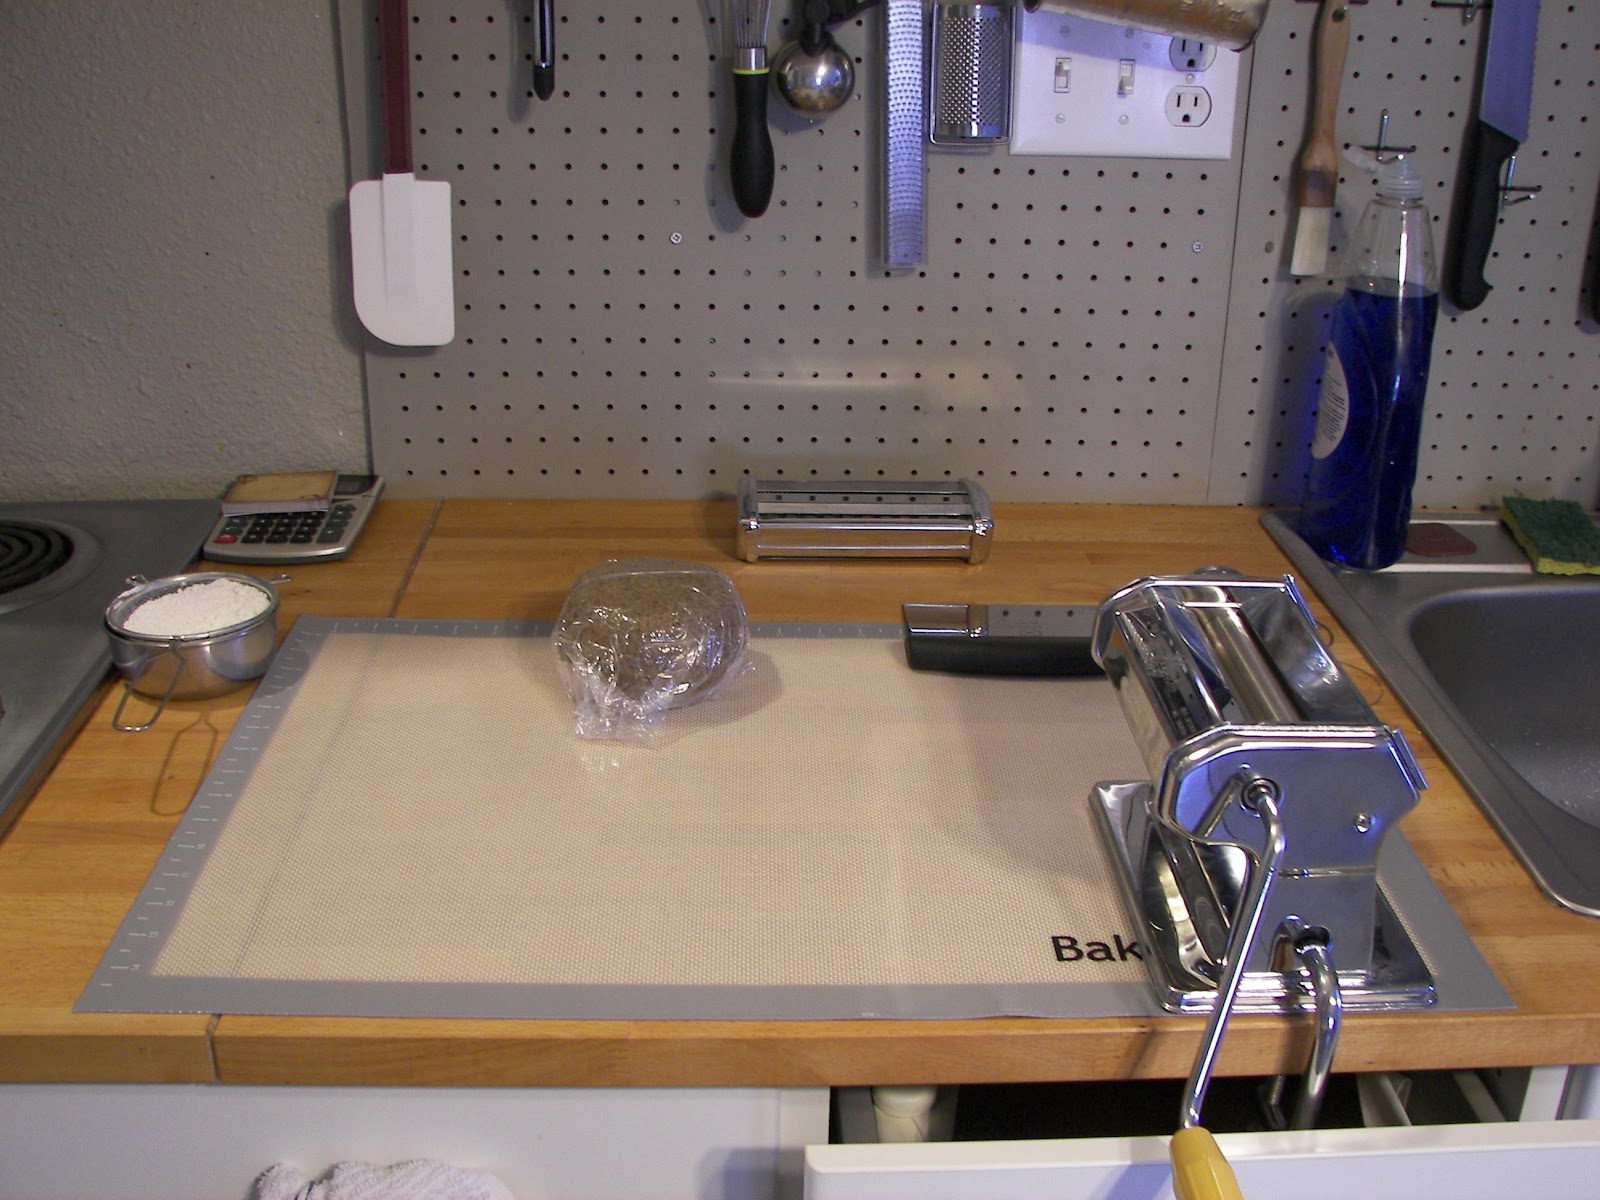
Homemade Pasta: Soba Noodles
Not long after I finished the orecchiette, I was reading on a friend’s blog about how much her son, who apparently can be quite a picky eater, relished soba noodles. Still in the pasta making mindset, a light bulb went off that I had never made soba noodles. In fact, I think I’ve only eaten them a handful of times. For some reason they just aren’t something I think to buy.
 |
| dough after resting |
Since I wasn’t that familiar with them, I did a little online research. Most of the recipes I found included using a combination of buckwheat and whole wheat flour at an 8:2 ratio. Some recipes used whole eggs, some used whole eggs and yolks, some used oil, some didn’t. I figured with all of the variations out there, I’d apply what I learned, wing it and adapt the recipe I used for the orecchiette.
Let me begin by saying I don’t think the dough for soba noodles (at least my version) is ideal for the food processor. I don’t have a photo of the mess I made because my hands were covered, covered, in thick, sticky buckwheat dough. (The recipe below does not include using the food processor.) I ended up kneading a small amount of extra buckwheat flour into the dough to firm it up a little. When it got to the point that I could handle it without it sticking to me, I wrapped it up and stuck it in the refrigerator.
 |
| noodles cut by machine |
The next day I rolled out some of dough to cut noodles by hand. It didn’t go well. To begin with, I think I actually rolled the dough too thinly. And I didn’t rotate it frequently enough. The dough will stick to a silicon mat – not horribly, but enough to make things difficult. Additionally, although the dough didn’t feel dry, it behaved like it was too dry. I ended up rolling it all back up into a ball, re-wrapping it and putting it back in the refrigerator.
 |
| letter-folded dough |
The extra day in the refrigerator made all the difference. It allowed the flour to fully and evenly absorb the liquid from the eggs. Feeling a bit gun-shy on rolling and cutting the noodles by hand, I got out my manual pasta roller/cutter. After cutting two sheets of noodles, I decided to go back to trying to roll and cut them myself. I didn’t roll the dough as thinly this time and with the extra day resting, it rolled perfectly. And it ended up being much quicker than running small pieces through the pasta machine repeatedly.
 |
| cutting noodles by hand |
Several of the recipes I found included photos on how to cut the noodles. It appeared as though the dough was letter folded and sliced. I cut the noodles that way and then laid them out in a single layer on flour sack towels to dry. Apparently as they dried and contracted, the pull on the folded areas was enough to break the noodles apart. While I’m not heartbroken over that, the noodles cut with the pasta machine are much more aesthetically pleasing. I think rolling the dough by hand and cutting the noodles with the machine would be the ideal solution.
 |
| original drying method |
As for drying, my original thought was to leave the noodles to air dry. The weather has intervened and since it’s been damp and rainy I ended up putting them in the dehydrator. I wasn’t thinking about how much they had dried when I cooked some for dinner this evening; and I’m not sure if soba noodles needed longer to cook than traditional pasta. They needed more time than I gave them and were very al dente in my stir fry. I think I’ll boil another handful tomorrow just to see how they are when properly cooked.
 |
| the finished noodles |
Soba Noodles
2 cups buckwheat flour
1/2 cup whole wheat flour
4 large eggs
1 tsp black sesame oil
1 tsp peanut oil
All-purpose flour for rolling
Combine the flours in a large bowl. In a separate bowl, beat the eggs lightly with the oils. Make a well in the center of the flours and add the egg oil mixture. Stir with a wooden spoon, starting in the center and working your way out. When the dough gets too stiff to stir, use clean hands to thoroughly combine.
Form the dough into a ball, wrap in plastic wrap and refrigerate for one to two days. Allow dough to warm up for 20 – 30 minutes before rolling.

Use a mesh strainer or sifter to dust flour on a large silicon mat. (The silicon mat is not required, but definitely makes it easier.) Cut the dough in half, placing half in the center of the flour and re-wrapping the other half. Dust the top of the dough with flour and flatten with the heel of your palm into a disk.
Roll the dough into a rectangle about 1/16th of an inch thick. Rotate and flip the dough frequently and dust with flour as needed to keep from sticking. Very lightly dust the top of the dough with flour and fold into thirds like a letter. Turn the dough so that one of the folded edges and in front of you. Trim the unfolded edges evenly and then cut the noodles from folded edge to folded edge approximately 1/4-inch wide. Transfer the noodles to baking sheets lined with lint free towels and unfold in a single layer. Repeat with the remaining half of dough.
If you prefer to use a pasta roller/cutter, follow the directions with your machine and begin with smaller pieces of dough. When rolling the dough, keep in mind the length of noodles you want. It’s possible to make really long noodles, but storing them may be problematic.
The noodles may be used fresh or dried. For storage, allow the noodles to dry until brittle. If desired, the noodles can be dried in the oven set on the lowest temperature. I've not tried freezing fresh noodles, but that may also be a possibility.
Tuesday, March 6, 2012
Homemade Pasta: Orecchiette
Every so often, I go through a phase of making pasta from scratch. There are multitudes of accessories for making and shaping pasta. I own quite a few of them myself and am always on the look out for vintage pasta equipment. Even with all of the gadgets though, I still prefer to make pasta by hand.
I’ve made pasta dough using the “well method” of mounding the flour, placing the wet ingredients in a well in the center and gradually drawing in the flour. It’s messy, but authentic. I’ve made it in my stand mixer - less messy and not so authentic. I’ve made pasta dough in an electric pasta maker which mixes and extrudes the pasta - absolutely nothing authentic about that. This thing is not fun to clean and I only use it when I want to make tube-shaped pastas.
This time I made the pasta in the food processor based on this recipe from Williams-Sonoma. I did substitute about half of the all-purpose flour for semolina flour. (Of note: the fault I find with this recipe is that it calls for “4 eggs” without specifying the size of the eggs. Since my eggs were extra-large, I needed more flour than the recipe required. Should I use this recipe again, I’ll probably just go with three extra large eggs.)
Orecchiette is one of my favorite pasta shapes. Orecchiette means “little ears”. It’s quite simple and doesn’t necessarily require any of the special equipment in my possession. Williams-Sonoma also has instructions on shaping orecchiette. My homemade version uses a slightly different method and doesn’t look like the little saucer-shaped orecchiette you buy packaged. They look more like . . . well . . . little ears.
 |
| Begin by slicing off a piece of pasta dough. Keep the rest covered. |
 |
| Roll the pasta dough into a rope about 1/2-inch thick. My dough was quite elastic and would snap back a bit after rolling. |
 |
| Cut the dough rope into 1/2-inch pieces with a bench scraper or thin-bladed knife. My intent was to use the guide on the silicon mat, but that wasn't working out so well for me. |
 |
| Instead I chose to pinch the dough and cut next to my fingers. This is why I prefer a bench scraper to a knife. I can be accident prone. |
I tried to photograph shaping the orecchiette, but I am so right handed it's unreal. My left hand was totally incapable of reaching the shutter release on the right side of the camera and completely inept at trying to shape the orecchiette. My solution is this brief, extremely amateurish, video. There's no narration, just some strange clicking noise in the background.
After mixing the dough, letting it rest and shaping the pasta I loaded it up on mesh lined dehydrator trays and dried it at 95°F for about 24 hours. I once read (I wish I remembered where) that the best pasta is dried at low temperatures. It would have been great to let it dry naturally in the sun, but I wasn’t going to sacrifice that much real estate on the kitchen table. It's worth pointing out that drying is not necessary. You can use the pasta fresh, but it won't have the al dente quality I like in pasta.
 |
| The finished pasta. I think some bolognese sauce is in order. |
Before the pasta phase passes I’m hoping to get some ravioli made (still trying to decide on the filling) and some simple sheets for homemade lasagna. And then there’s that recipe for sweet potato gnocchi that’s been collecting dust in a folder waiting to be realized and the virgin gnocchi board waiting to be used.
Subscribe to:
Posts (Atom)