Friday, January 27, 2012

Sourdough Surplus

When I signed on for Tea & Cookies Cooking Challenge of sourdough bread with homemade starter, I had no idea how much starter I would end up with.  The reason I have so much starter is that unlike the instructions direct, I cannot bring myself to throw away portions of it.  So it just keeps multiplying. 

quantity of starter this morning

quantity of starter this afternoon
(the three half-pints are sitting in the dish in case of overflow)

Friends and neighbors beware.

Once I figured out that I was going to have more sourdough starter than any individual should ever need, the search for recipes using sourdough starter began.  Thus far, I’ve identified four recipes from the King Arthur Flour website to try:  sourdough chocolate cake, sourdough carrot cake, sourdough pizza crust and sourdough ciabatta.  (As my previous attempt at ciabatta didn’t work out as well as I would have liked, I thought it only fitting to include that one.)  In addition to these four, there will also be the upcoming sourdough bread recipe from the Tea & Cookies challenge.

Methinks I’m going to be more of a baker than a homemaker this coming week.  Thank goodness I have a patient and understanding husband!

Thursday, January 26, 2012

Almost Ciabatta and Experiments in Risotto No. 2

Today was yet another rainy, grey day in Southern Illinois.  It’s supposed to be sunny tomorrow and I am so hoping that will be the case.  But days too hideous to be outside are perfect for being in the kitchen.

Yesterday I had started a poolish to make ciabatta in another attempt at using up the previously noted bag of flour.  (A poolish is similar to a biga and other yeasty bread starters, but contains equal portions of flour and water.)  I was excited about making the ciabatta as it’s one of my favorite breads.  I’ve attempted it in the past with various levels of disappointing results.  Today was no different.

attempting to "fold" the dough

The dough for ciabatta is extremely soft in comparison to most other bread doughs.  Mine was too soft though, it was almost like a batter.  The fact that the humidity was 96% could have contributed, but ciabatta is one of those breads you just have to have a feel for the dough and whether or not it needs more flour.  I’ve not developed that feel yet. 
The loaves also probably should have been baked a few minutes more, but the cornmeal I had sprinkled on the baking sheets was beginning to scorch in the 465° oven and I wasn’t interested in filling my kitchen with the smell of the burnt cornmeal. 

Other than being pale, the crust has a decent crunch.  The interior was disappointing for as soft as the dough was, I was expecting a coarse texture with large holes.  Not so much.  It certainly doesn’t taste bad, but it’s not bread I would readily pay for.  I’ll spare you the recipe on that one until I’ve found one that’s near fool proof.

The second kitchen project was another risotto experiment.  This time instead of savory, I went the sweet route. 

very simple ingredients

Allow me to introduce you to Apple-Cinnamon Risotto.  This isn’t intended to be a side dish or even a dessert.  It is comfort food, plain and simple:  full throttle fat, calories and carbohydrates.  My initial thoughts of this were for something along the lines of a thick, but slightly soupy, rice pudding.  However, the rice just sucked up my last addition of liquid meant to contribute to the soupiness.  If rice pudding is more your style, I think serving it with some warm milk or cream for pouring would be just perfect.

it's quite possible that a spoonful
of mascarpone could make just
about anything better
 
As it turned out, I was perfectly happy with the scoop of mascarpone stirred in at the end.  I do think this risotto would be the perfect canvas for sweet arancini as well.  (Arancini are sort of the Italian version or rice croquettes.)  If I liked deep frying more than I do, I would wrap some of this risotto around a small dollop of caramel, roll them in some sweet bread crumbs and fry until golden and crispy.  And then probably make myself ill eating them.

I have a few more ideas for sweet risotto I hope to realize sooner than later.  Or as soon as I get that bag of flour used.

Apple-Cinnamon Risotto
2 cups unsweetened apple juice (mine was from frozen concentrate)
2 cups milk
2 Tbs unsalted butter
3/4 cup Arborio rice
1/4 tsp kosher salt
1/2 tsp cinnamon, or to taste
2 Tbs mascarpone

In separate measuring cups, heat the apple juice and milk in the microwave or in small pans on the stove top.  Do not mix them – the acids in the apple juice will curdle the milk.  Keep warm, but do not boil. 

Melt the butter in a large sauté pan over medium – medium low heat.  When the butter is fully melted and just beginning to bubble, add the rice.  Stir the rice to coat it completely in the butter.  Cook and stir until the outside of the rice is almost transparent and the inside still opaque. 

Add the about 1/3 cup of the apple juice, cook and stir until almost completely absorbed.  Add about 1/3 cup more of the apple juice.  Cook and stir the rice until the liquid is nearly absorbed, but don’t let the pan get dry.  Repeat the process until all of the apple juice is used, then begin adding the milk in 1/3 cup increments.  Keep adding liquid until the rice is fully cooked, but still has a slight firmness in bite. 

When the rice is fully cooked, stir in the salt and cinnamon.  Stir in the mascarpone and serve immediately.

Makes about 3 cups of risotto.

Tuesday, January 24, 2012

Focaccia

This post was actually supposed to happen yesterday.  But when I checked my biga yesterday, it was still the same lump of dough that hadn't risen one bit.  I couldn't figure out why.  I double checked my recipe conversions - they were spot on.  The only thing I could think of was perhaps it was the flour.  So for my second biga, I used some bread flour instead of the Italian 00 flour.  I peeked at it throughout the day yesterday check its progress.  It was working.  Sigh of relief.

ready to go into the oven
Although the recipe says the biga needs to ferment at least 18 hours, that doesn't have to be to the minute or even to the hour.  Mine went closer to 24 hours just because of the time I started it.  I don't mind getting up early, but I wasn't interested in getting up at 3:30 a.m. to start bread when I hadn't gone to bed until midnight.

Overall this is a relatively simple recipe and it doesn't require much in the way of special equipment, other than a scale as the recipe is by weight and not volume.  Since a lot of scales use 1/8 ounce increments instead of 1/10, I've also included gram weights as most scales usually have both standard and metric. 
fresh from the oven
I bake my focaccia in 10-inch round cake pans just because I like the shape.  (I may try a heart shaped pan for Valentine's Day.  Cheesy, I know, but Valentine's Day can be kind of cheesy in general.)  You can also just shape the dough on baking sheets.  It is a slack dough, however, so if you make two loaves instead of one large one, be sure to leave room in between. 

The next project will be ciabatta, but I'm also following along with Tea & Cookies Cooking Challenge of sourdough bread from homemade starter.

There are going to be a whole lotta carbs going on in this house!

Focaccia
Biga:
6.6 oz (188g) bread flour
3.6 oz (103g) water
1/16 tsp instant dry yeast

Mix the biga 18 hours in advance in a large container and allow to ferment.  It will be like a stiff dough.  Make sure that all of the flour is moistened.

Dough:
15 oz (424g) water
All of the biga
1.6 oz (47g) olive oil
1 lb, 5 oz (594g) Italian 00 flour or bread flour
0.1 oz (3g) instant dry yeast
0.5 oz (14g) salt
sea salt as needed
extra olive oil for containers and pans

In the bowl of a stand mixer fitted with a dough hook, add the water.  Tear the biga into small pieces and add to the bowl.  Mix on low speed (2 on a KitchenAid) for two minutes to break up the biga.
Add the olive oil, bread flour, yeast and salt.  Mix on low speed for four minutes; then on medium (4 on a KitchenAid) for two minutes.
Scrape the dough out into an oiled container at least twice the volume of the dough.  Cover loosely with a lid or plastic wrap and ferment (let rise) for 45 minutes.
Fold the dough on to itself and ferment 10 more minutes.
Scale the dough into 1-1/2 pound portions if making two loaves.
Place into oiled 10” round pans or on an oiled, rimmed baking sheet. 
Cover and ferment 15 minutes.
Preheat oven to 475°F.  Gently spread the dough if necessary.  Ferment 45 minutes.
Dip your fingers in olive oil and stipple the focaccia rounds.  Add sea salt and as desired.
Bake 18 to 20 minutes, until the tops are golden brown.
Remove from the pans to a wire rack and cool completely.

read to EAT!!

Sunday, January 22, 2012

A Bag of Flour

Have you ever purchased an ingredient with the best intentions of using it right away, only to lose it in the back of a cupboard, the refrigerator or the far recesses of the pantry?  This happens to me quite often, I ashamed to admit. 

Last week I discovered this bag of flour I purchased at Di Gregorio's Market in St. Louis. 

Although I wasn't worried about the flour "going bad", its best used by date was long gone.  So now I'm on a quest to use this entire 5 kg (11 lb) bag of flour. 

As quickly as I can. 

Last weekend I made homemade pizza using a no-knead crust recipe from King Arthur Flour and a sauce recipe from Tyler Florence.  (I didn't have any majoram on hand, so I substituted an equal amount of dried thyme.  I also added a pinch of ground chile.)  Overall I was pretty happy with that one, but the crust was a little more "bready" than I would have liked.  No photos of this one; they all looked fuzzy since the hot from the oven pizza steamed my camera lense.

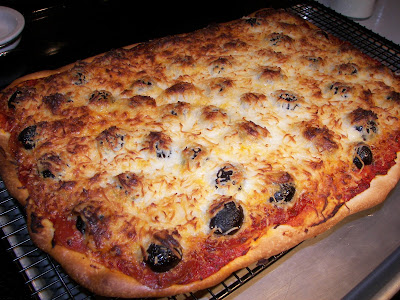
A mere six days later, I was trying another pizza recipe.  I wasn't worried about Tug being tired of pizza since I think he could eat pizza on a daily basis.  This time I used a different crust recipe to make a thin crust.  Had I followed the directions, I think I'd like this crust better.  Instead of making two pizzas, I chose to make one larger pizza and apparently didn't spread the dough thinly enough.  I'll definitely try it again and either roll the crust thinner or make two pizzas.

Before the next pizza attempt, or perhaps in between attempts, I'm going to take a stab at some different breads. 

This afternoon I started the biga (a pre-ferment) which has to sit at least 18 hours before I can use it to make focaccia.  Then I'm going to try my hand at ciabatta again.  My previous attempts at ciabatta haven't exactly met my expectations. 


And I'm thinking of making some more panettone, even though it's not Christmas Eve I think it will still taste as good.

Saturday, January 21, 2012

Sowing the Seeds of Summer

It's a cold, grey day in Southern Illinois.  It's one of those days that no matter what sweater I put on, how close I am to the space heater, how long the furnace runs, I cannot get warm.  And getting motivated to do anything is monumental. 

On a sunny day earlier in the week when my motivation was much higher, I decided it was time to get some seeds started for the summer.  The seed trays came out of their dusty hiding place and fortunately I still had seed starting mix so I wasn't derailed from my project by having to run out and get supplies.  It was a warm day for January and a great day to be outside, which was perfect since filling the trays can be a messy job.

You can see that there are two different soil mixes in the tray on the left.  I could tell you that I am conducting an experiment on which soil mix is the best, but the truth is that I ran out of one and finished with another.  When starting seeds, it is really important to use a soil mix specifically for that purpose:  it's lighter and doesn't contain fertilizers that can be too much for seedlings.  The lightness of the soil mix also makes it challenging to water when it's dry.  Often the water will just pool on top.  After I filled these trays, I took them inside to where I'll be keeping them and filled the bottom section with water to allow it to wick up from the bottom.  After that, I'll use a spray bottle with a fine mist to water.  The soil should be moist, but definitely not soggy.  Soggy soil leads to rotting seeds. 

I have to insert a note here:  you can also purchase soil "plugs" to fit into the seed starting trays that you just drop the seeds into and water.  They are extremely convenient and less messy than the soil mixes, but based on my previous experience I don't recommend them.  One year I did do an experiment comparing the plugs to regular seed starting mix.  The seeds started in the plugs produced seedlings that were weak and spindly and had significantly less root development.  They are also much more expensive than a bag of seed starting mix.

chile peppers and flowers
Lacking motivation to do anything else today, it seemed a good time to focus on finishing the seed project that reminds me there will be sunny days ahead.  Since I will once again be container gardening on the deck to avoid deer damage, the variety of seeds I started is somewhat more limited than it would be if I had a traditional ground plot.  I started a couple of varieties of tomatoes and more varieties of chile peppers than most would think sane, plus some flower seeds that I've collected over the years. 

Ordinarily I'd spend hours pouring over various seed catalogs, reading all of the descriptions, comparing one variety to another, one catalog to another, all in an attempt to choose the perfect seeds.  This year my choices were much less discerning.  This year, my choices were based on "which seeds have I had the longest?"

chiles, chiles and more chiles
In years past, I would also carefully read each seed packet, taking note of the days to germination and stagger my planting so that most of the seeds would germinate at the same time.  (Yes, I realize I have OCD tendencies.)  Because some of the seeds I started today were originally packaged for the years 2003 - 2006, I'm keeping my expectations for germination in general limited.  This is also the reason for planting the quantity of seeds that I did.  If the seeds happen to germinate better than I expect, I'll have a lot of seedlings in need of adoptive homes. 


grow, baby, grow

So what exactly did I plant?  Here's the run down:

Chiles:  Ancho Poblano, Big Chile, Hidalgo Serrano, Brazilian Pumpkin, Aji Amarillo, Purira, Manzano Amarillo, Ancho Mulato, Pasilla, Royal Black, Czech Black, Habanero Red Savina, Largo Purple, Fresno and NuMex Joe Parker

Tomatoes:  Beefsteak and Rutger's Select

Flowers:  pink cleome, butterfly milk weed, black hollyhocks, red hibiscus, red cannas, and borage (which is an herb, but I'm growing it for its flowers)

Based on the germination rates, seeds that don't do well will be discarded this year.  I need to get the stockpile down so I can justify ordering more.  I am a sucker for those gorgeous, colorful seed catalogs!

Sunday, January 15, 2012

Experiments in Risotto No. 1

Within these pages I have already professed an intense fondness for risotto.  Truth be told, I probably spend an abnormal amount of time thinking about risotto and various incarnations of it.  The latest version has been running around in my thoughts for about a week now.  Tug seemed a little tepid about the idea, so I’ve been putting it off, but realization of the idea became necessary. 

Bacon and bleu cheese risotto. 

There.  I said it.  Across the globe, Italian grandmothers are turning over in their graves.

Where the combination of bacon and bleu cheese began is beyond me, but it just seems so American:  hamburgers with bacon and bleu cheese, a tender filet wrapped in bacon and topped with bleu cheese – maybe it’s just the idea of meat and cheese together.  Whatever it is, I wanted to apply it to risotto.

How did it turn out?  I certainly wasn’t mad at it, and Tug gave it a thumbs up, but it didn’t exactly meet my expectations.  The biggest problem is that I really didn’t notice the bleu cheese at all.  For round two, I definitely think the parmesan needs to be reduced and the bleu cheese increased.  Or maybe I just needed a bleu cheese stronger than Gorgonzola (at least I used an Italian bleu).  I also used a domestic parmesan, which seemed more assertive than the Parmigiano Reggiano I ordinarily use.  The recipe is below as I made it.  The stock I used was some of the turkey stock I made and froze after Thanksgiving, but chicken or vegetable stock work equally well.

There are a few photos missing from my progress.  I was having difficulty cooking, getting photos and keeping Tug out of the bacon.

Bacon & Bleu Cheese Risotto
6 slices bacon, slightly frozen or very cold
1 cup medium diced red onion
2 cups Arborio rice
1/2 cup dry white wine* such as Pinot Grigio
4 to 6 cups homemade or low-sodium stock
1-1/2 cups grated parmesan cheese, divided
3/4 cup bleu cheese, crumbled (I used Gorgonzola)
Salt and pepper to taste


Make sure to start the bacon in a
cold pan to render the fat.

Slice the cold bacon crosswise (about ¼-inch strips) and place in a large, high-sided sauté pan.  Set the pan over a cold burner and set the heat to medium-low .  Slowly cook the bacon to render the fat and crisp the bits. 


Perfectly crisped bacon!

When the bacon bits are crisp, remove them from the pan with a slotted spoon to a paper towel lined plate and set aside.  Don’t worry about the brown bits on the bottom of the pan.  They’ll come up when you start adding liquid.  Increase the heat to medium.  Add the onion and cook until transparent.  


To see if you're ready to add more
stock, run your spoon down the
middle of the pan.  If it leaves a
trail that liquid doesn't rush into,
you're ready for the next ladleful
of stock.

Add the rice to the pan, stirring so that every grain is coated in the rendered bacon fat.  Take your time – this step is really important.  Cook until the outside of the rice is almost transparent and the inside still opaque.  Add the wine, cook and stir until it's almost completely absorbed.  (*If you’d prefer not to use alcohol, just omit it and use extra stock.)  Add a ladleful (about 1/2 cup) of stock.  Cook and stir the rice until the liquid is nearly absorbed, but don’t let the pan get completely dry.  Add another ladleful of stock and repeat the process until the rice is fully cooked, but still has a slight firmness in bite.  This will take about 20 minutes or so.  Taste the rice after adding about four cups of the stock to check for doneness.


Add one cup of the parmesan and the bleu cheese and stir gently to combine and melt.  Taste the risotto and season to taste with salt and pepper.  Stir in the reserved bacon bits. 


Serve hot garnished with the additional parmesan.


Buon Appetito!


Thursday, January 5, 2012

Baking Memories: Grannie's Cinnamon Rolls

Growing up in a very small town (a village, actually, of about 200) there were events and traditions you could count on year after year:  there would always be a community fish fry around Labor Day, a weenie roast at Halloween, and one of the villagers would dress up and play Santa for the kids at Christmas.  My dad did it one year - he didn't fool me at all.  The weenie roast and bags of candy from Santa were provided by the village, but the Fish Fry was an annual fundraiser held for the Fire Department and, later on, the Ambulance Service.  There was never any shortage of good food, friends and neighbors, and certain pairs of brothers always getting into fist fights. 

Grannie Helen
Although my grandmother usually only made cinnamon rolls at Christmas time (she always took a tray over to the neighbors on Christmas morning), at some point she started making them for the bake sale table at the fish fry.  The ladies working at the table would carefully plate the rolls individually on little foam plates and wrap them in plastic before setting them out on display.  The first year Grannie only made one tray of rolls for the bake sale.  Not very many people had the opportunity to try them that year.  That year, our village marshal bought one of the cinnamon rolls and ate it on the spot.  And then he bought the rest of them.  All of them.  After that, Grannie made two trays of cinnamon rolls:  one tray to individually wrap and sell to people attending the fish fry, and one tray to wrap in its entirety and sell to the marshal.

Over the years, I've had many disappointments trying to re-create Grannie's cinnamon rolls.  I can't tell you how many different recipes I've tried.  "So," you ask, "why didn't you just use her recipe?"  Because I never saw Grannie use a recipe.  While I'm sure she owned measuring cups, they didn't get used much.  She poured ingredients into a bowl without seeming to even think about what she was doing and they turned out perfectly every time.  She just knew the recipe.  I didn't.  And I didn't think a written recipe existed.  But I was wrong. 

Grannie's cinnamon rolls came up while talking to my mom one day.  I was lamenting about my failures and the lack of a written recipe.  I nearly fell out of my chair when she said she had it.  Could it be?  When she sent it to me and I looked at it, I had some doubts.  Her report on her experience with the recipe was that it seemed like she needed a lot more flour than what the recipe called for and the baking time may have been too long.  Things to consider. 

Before beginning yet another attempt, I compared Grannie's recipe to some other egg/yeast bread recipes and came to the conclusion that two cups of milk was just too much.  If I had to venture to guess, I would say there are three possibilities:  1) Grannie never measured, so when asked to put a recipe in writing the amounts were her (perhaps inaccurate) estimation; 2) whoever typed the recipe may have made an error and the actual amount of milk is supposed to be 1/2 cup; or 3) perhaps Grannie new exactly what she was doing and just didn't want anyone else to be able to make her cinnamon roles.  

At first I considered reducing the milk to one-half cup, but instead went with one cup thinking I could add more flour if necessary.  It was necessary.  I used five cups of flour plus extra that was kneaded in.  It was also necessary to keep in mind that I was using my KitchenAid mixer.  Grannie didn't have a KitchenAid.  She had a strong right arm. 

I forgot to take pictures of the dough while it was coming together and there are no pictures while I was kneading it because I didn't want my camera covered in dough and flour.  Sometimes having a photographer would be very helpful.

Feeling a bit nostalgic, I decided to forgo the French rolling pin I ordinarily use in favor of Grannie's rolling pin.  It seemed fitting.  I chose to roll the dough on a silicon mat to make clean up easier, but it also turned out to making rolling up the dough easier as well.


I just lifted one edge of the mat and started rolling like a jelly roll.  As for cutting the individual rolls, I thought one-half inch seemed a little on the thin side so mine were closer to an inch thick.  I ended up with 17 full size rolls, plus the two ends.


Even though I cut the rolls thicker than directed in the original recipe, Mom said baking them 30 minutes seemed like too long.  I set the timer at 20 minutes, checked them and baked an additional 3 minutes.  Two minutes probably would have been better.  I let them cool slightly and made the icing.  Grannie would have made this icing with artificial maple flavoring.  There is no such thing in my house, so I used maple syrup. 


The end result:  they're not bad, but still not the same.  I think part of the problem is still with the quantity of milk.  Adding more flour to make the dough come together throws off the ratio of the other ingredients and, I think, alters the flavor and texture.  The next time I make these I'm going to reduce the amount of milk to one-half cup and add the flour gradually just in case that's not enough milk. 


The other part of the problem is that there's one ingredient missing that I'll never be able to add:  the love Grannie put into making them.